1.
Preparation
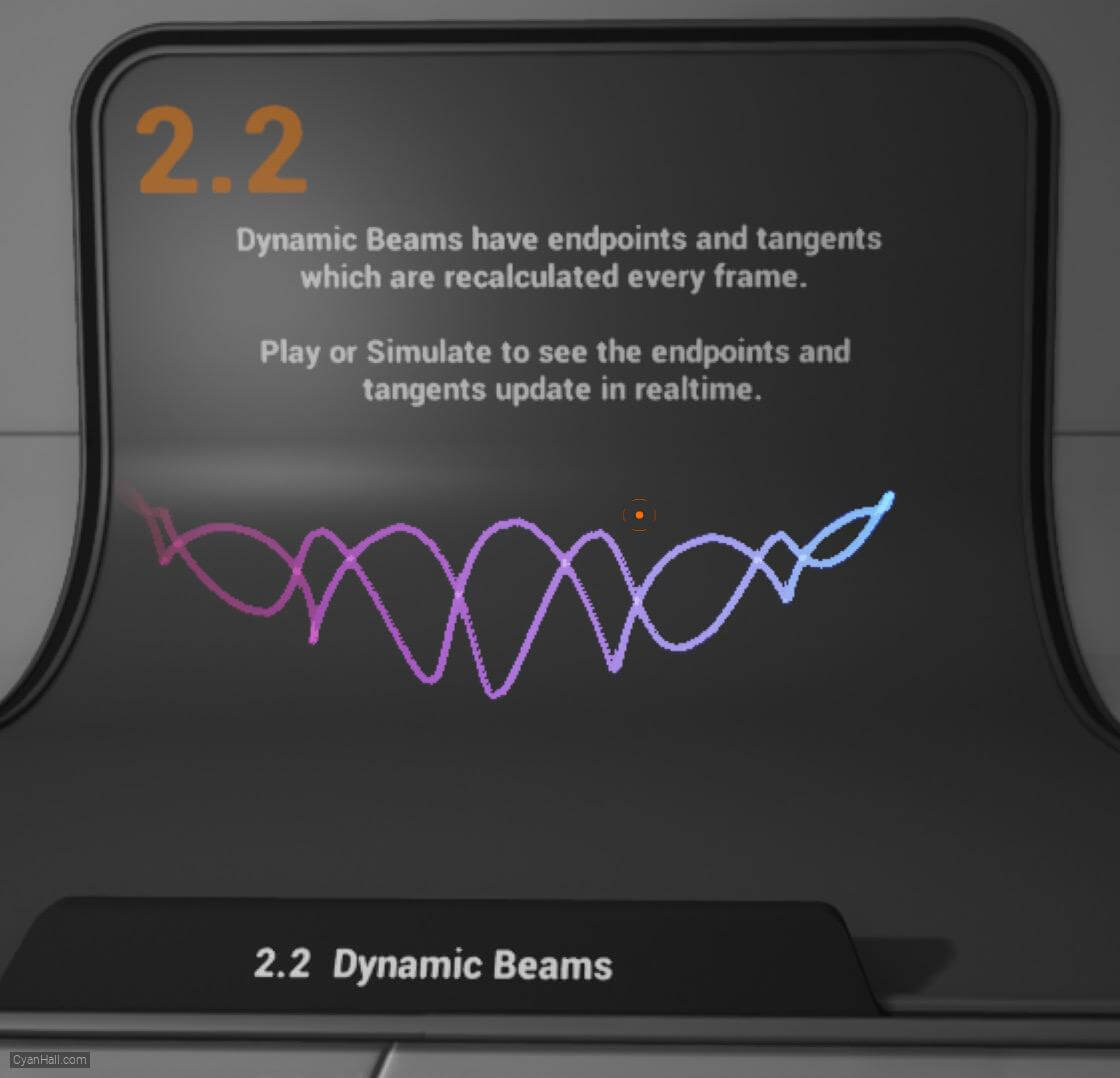
This is the effect we are going to make in this tutorial.
Note: The main content of this tutorial comes from the
Tip: Use ⬆️ ⬇️ to turn the page up and down. We recommend browsing with a large screen for a better reading experience.
Note: The main content of this tutorial comes from the
Content Examples that come with Unreal EngineTip: Use ⬆️ ⬇️ to turn the page up and down. We recommend browsing with a large screen for a better reading experience.

Full Tutorials:
1. UE Niagara: Simple Sprite Emitter
2. UE Niagara: Simple Mesh Emitter
3. UE Niagara: Simple GPU Emitter
4. UE Niagara: Sprite Facing
5. UE Niagara: Blend Attributes By Value
6. UE Niagara: Static Beams
7. UE Niagara: Dynamic Beams
8. UE Niagara: Multiple Renderers
9. UE Niagara: Location Events
10. UE Niagara: Expressions
3.
Introduction
Dynamic Beams have endpoints and tangents which are recalculated every frame.

4.
Let's start the reconstruction
Right click and select
FX => Niagara System to create. 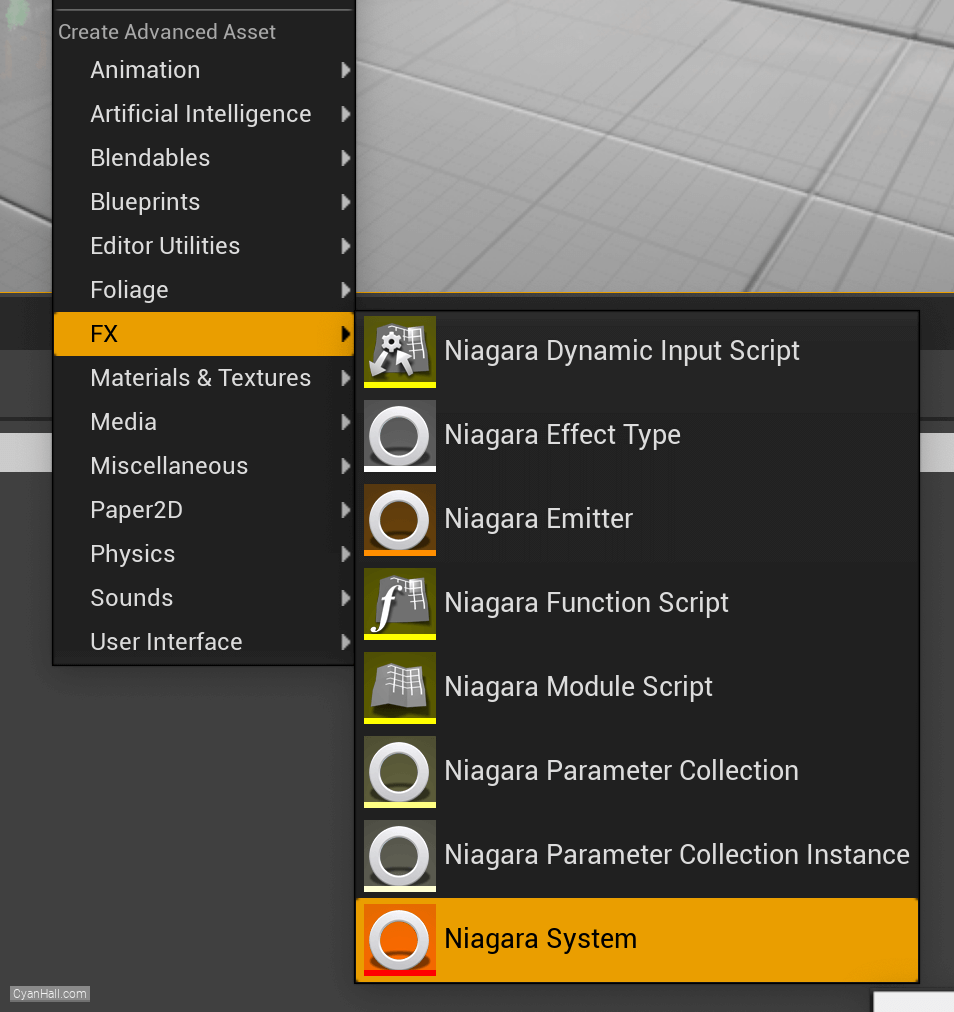
5.
Create Niagara System
Select
Empty template, click + and Finish 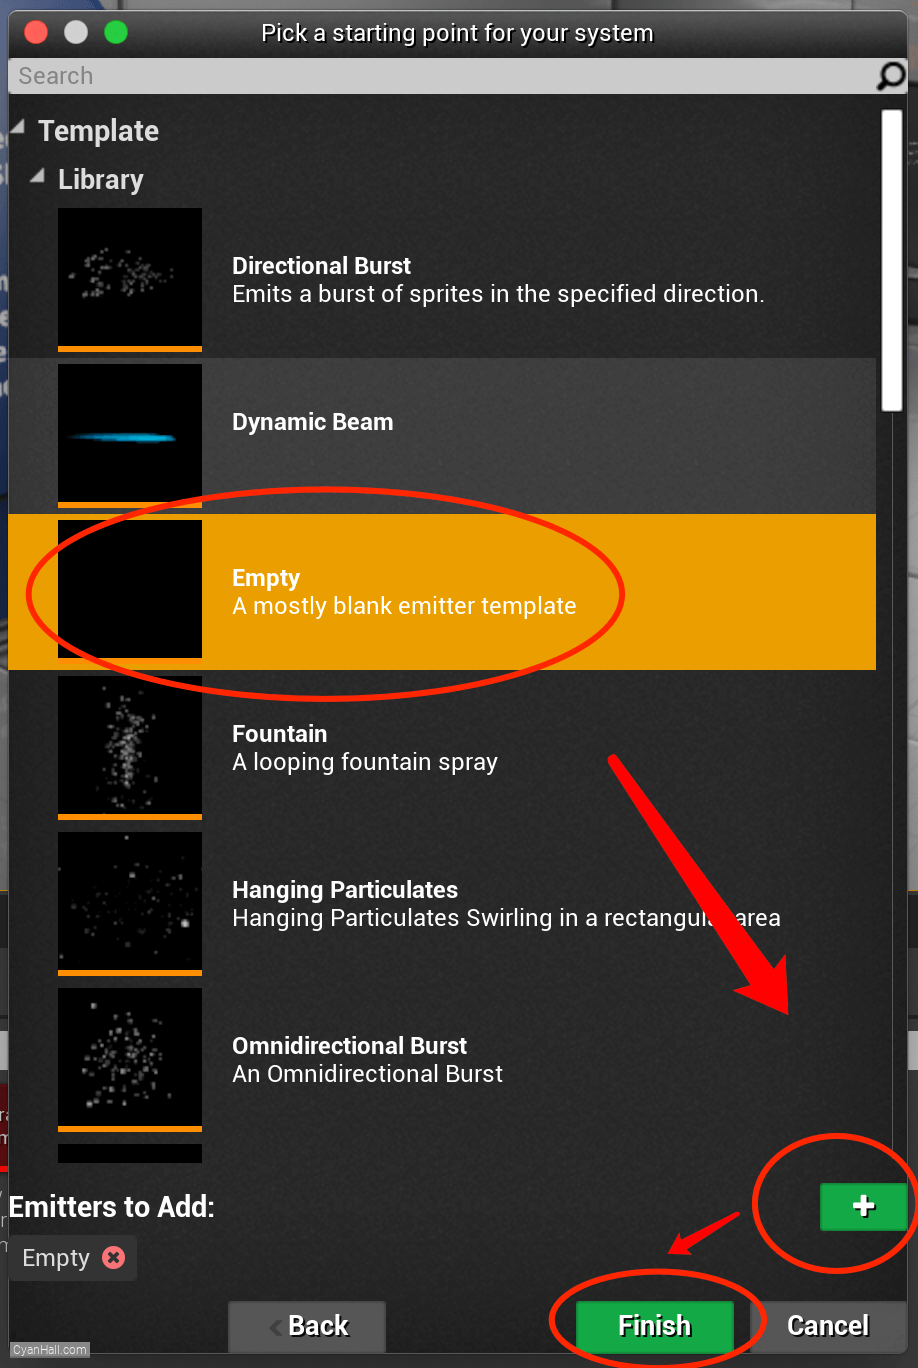
6.
Create Niagara System
As a result, we get a
Niagara System asset, click to open it. 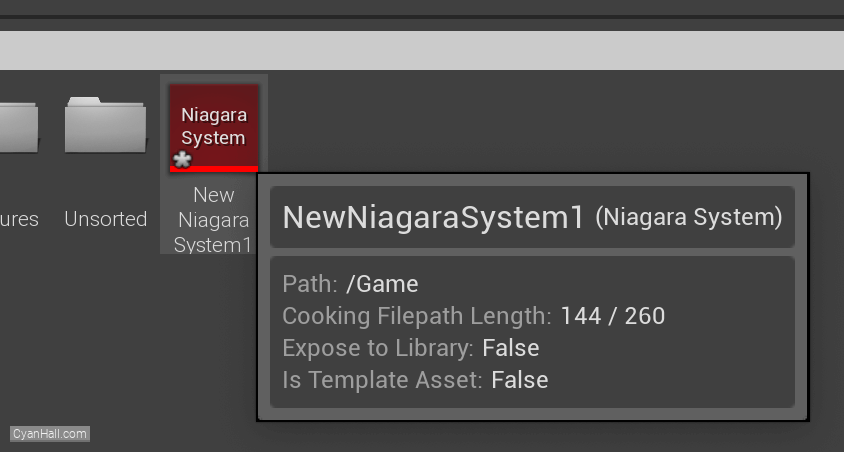
7.
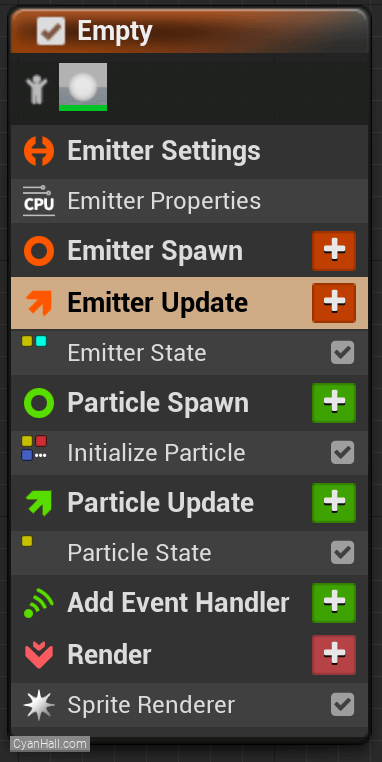
Empty Niagara System
You can see that we have an empty Niagara system.
8.
Beam Emitter Setup
Add
Beam Emitter Setup module to the Emitter Update section. 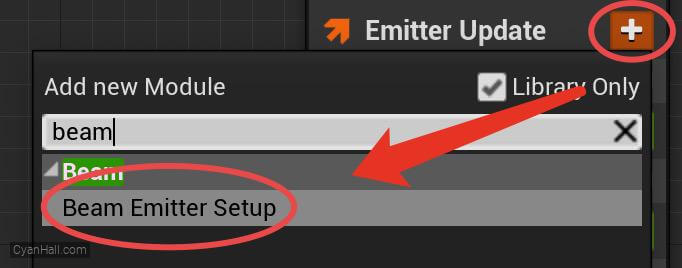
9.
Beam Emitter Setup
1. Set the value of Beam End to
2. Turn on
3. Turn on
4. Set the value type of Beam Start Tangent to
(8350, -1500, 100).2. Turn on
Absolute Beam End.3. Turn on
Use Beam Tangents4. Set the value type of Beam Start Tangent to
Multiply Vector by Float. 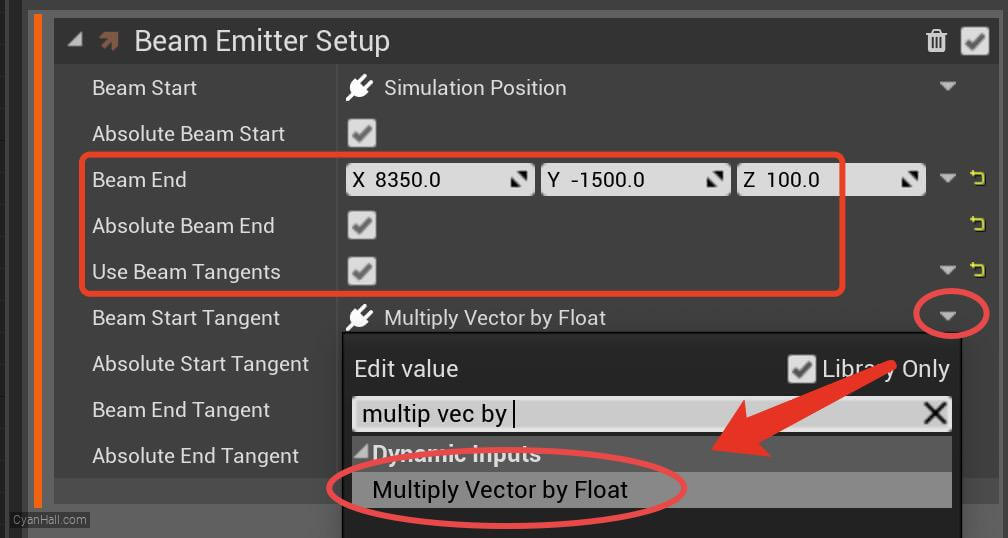
10.
Beam Emitter Setup
Set the Vector of Beam Start Tangent to
SystemXAxis. 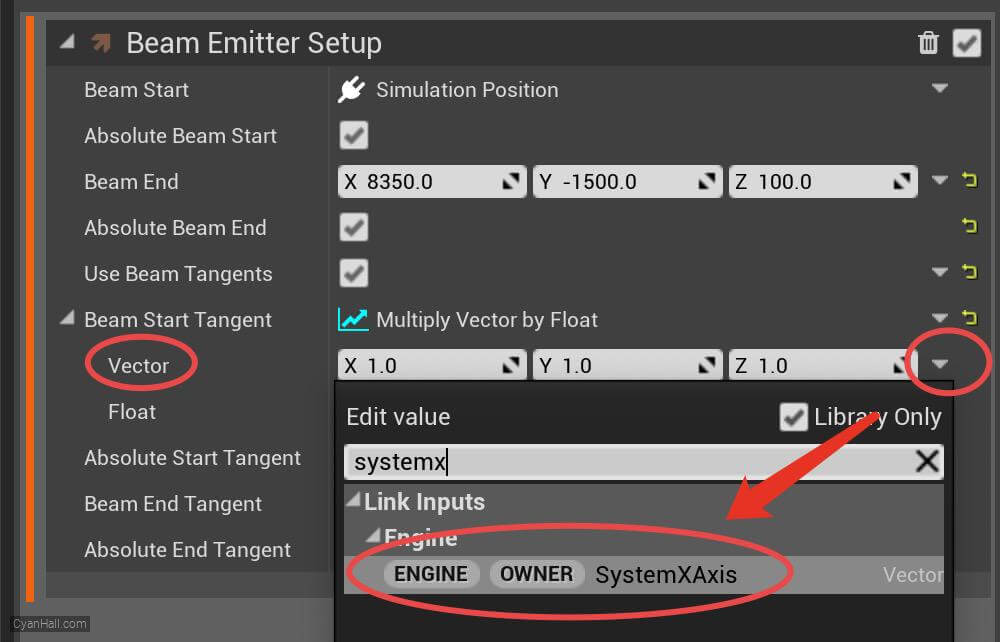
11.
Beam Emitter Setup
1. Set the Float of Beam Start Tangent to
2. Set the value type of Beam End Tangent to
0.5.2. Set the value type of Beam End Tangent to
Multiply Vector by Float. 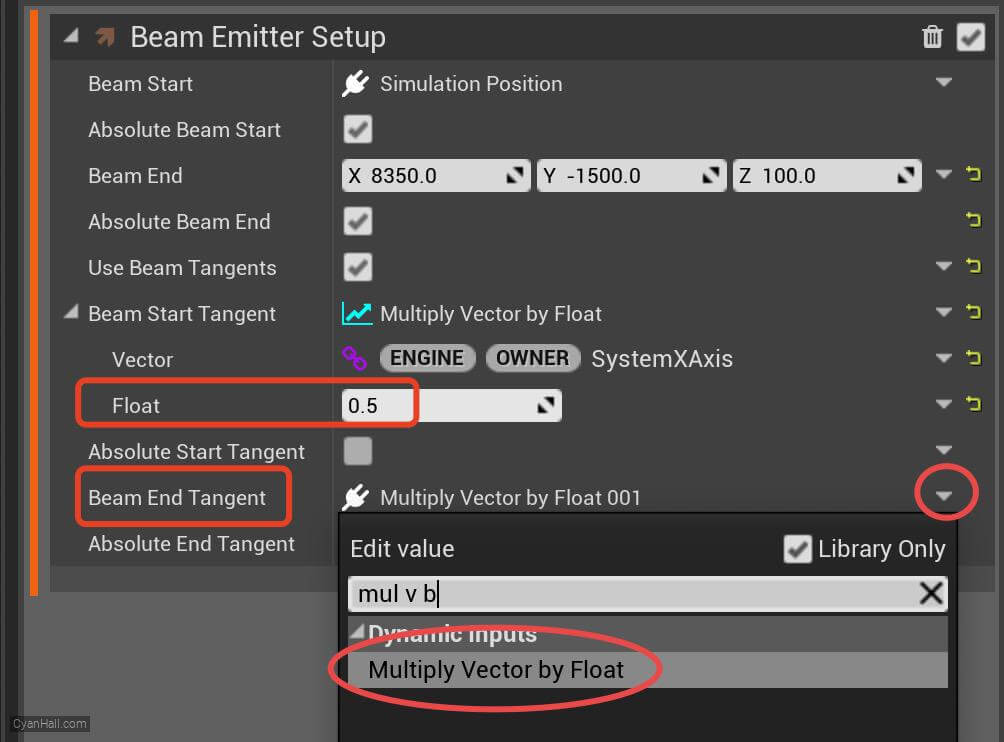
12.
Beam Emitter Setup
Set the Vector of Beam End Tangent to
SystemXAxis. 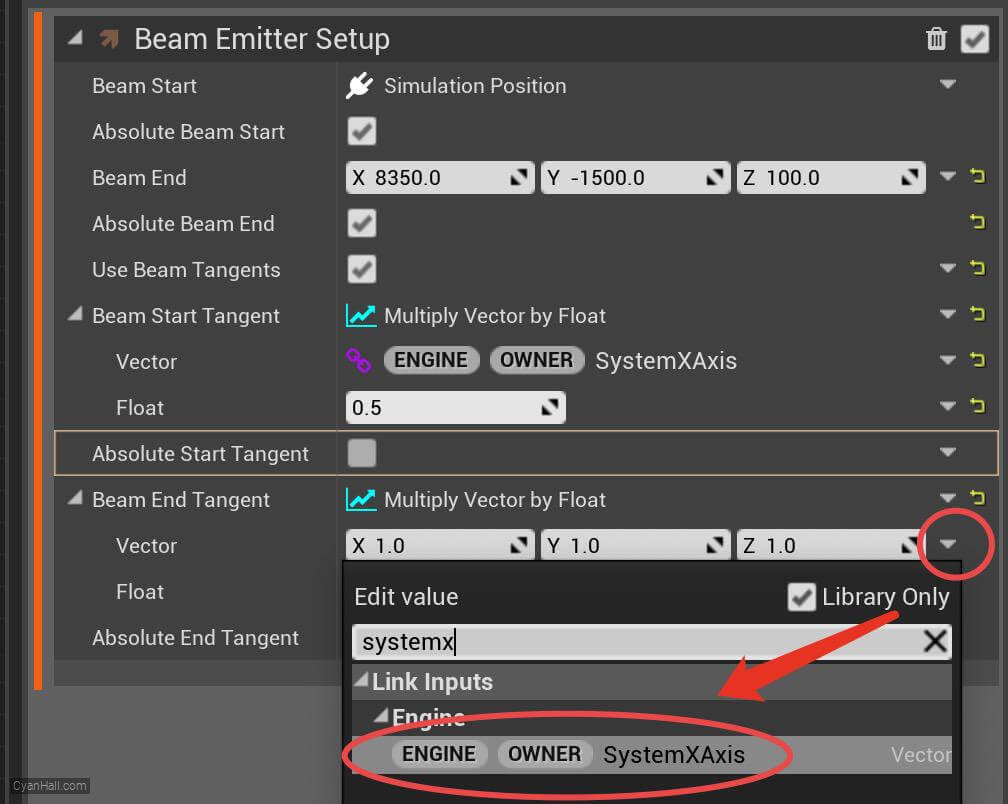
13.
Beam Emitter Setup
Set the Float of Beam End Tangent to
0.5. 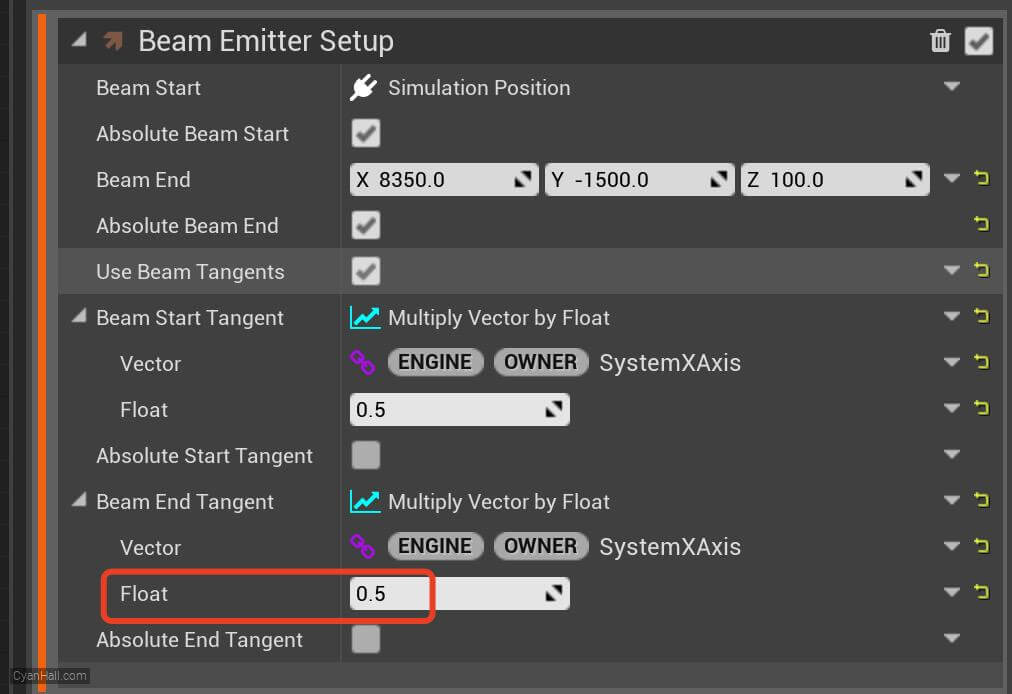
14.
Spawn Burst Instantaneous
Click on the
+ sign to the right of the Emitter Update to add the Spawn Burst Instantaneous module 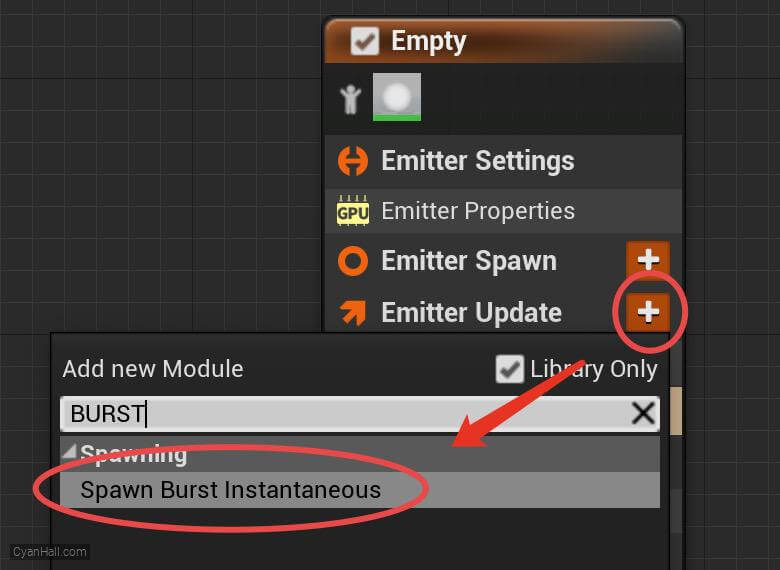
15.
Spawn Burst Instantaneous
Set
Spawn Count to 100.0 
16.
Remove Initialize Particles
Delete
Initialize Particles module. 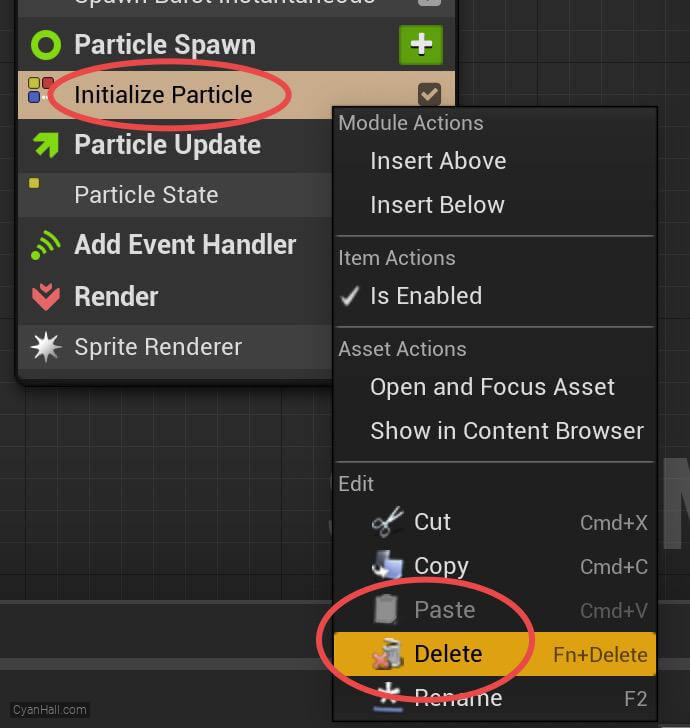
17.
Spawn Beam
Add
Spawn Beam module to the Particle Spawn section. 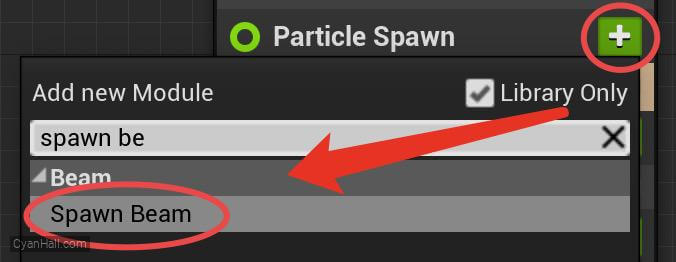
18.
Initialize Ribbon
Add
Initialize Ribbon module to the Particle Spawn section. 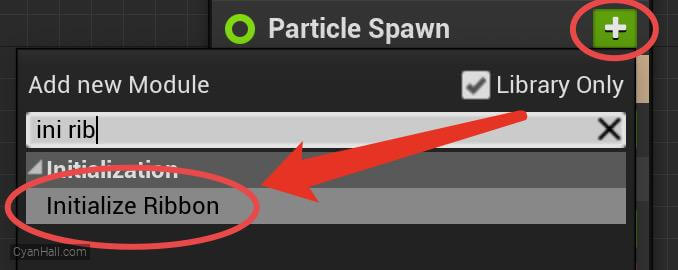
19.
Initialize Ribbon
1. Set
2. Turn off
Lifetime to 10.02. Turn off
Mass and Color3. Set Ribbon Width to 4.0 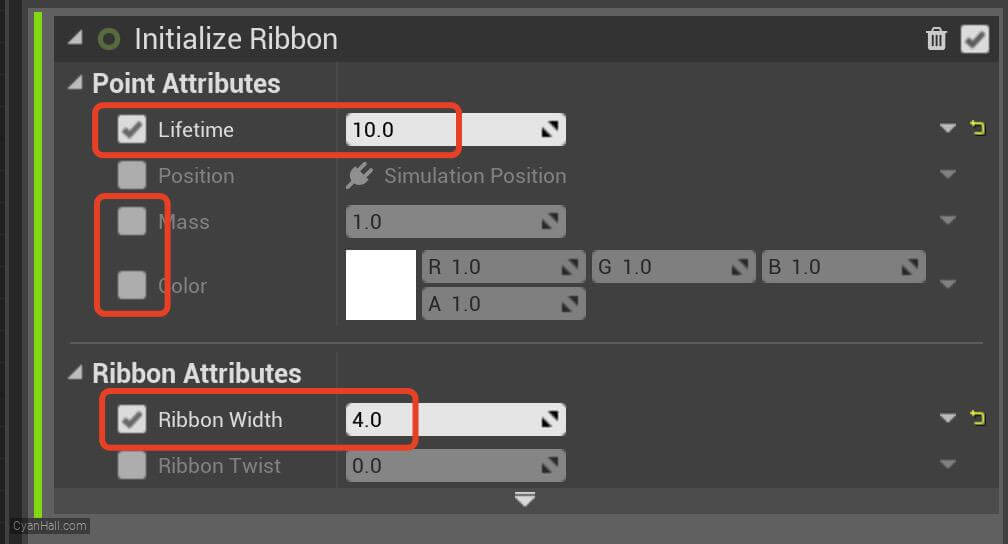
20.
Update Beam
Add
Update Beam module to the Particle Update section. 
21.
Rotate Around Point
Add
Rotate Around Point module to the Particle Update section. 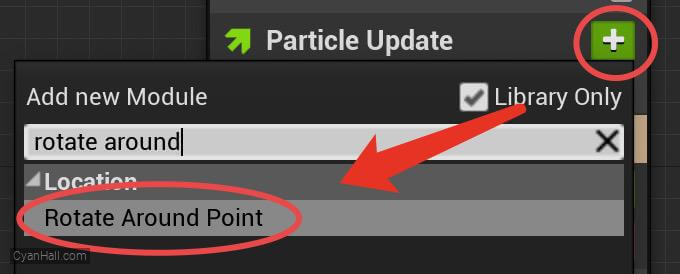
22.
Rotate Around Point
Set the value type of
Rotation Phase to Multiply Float 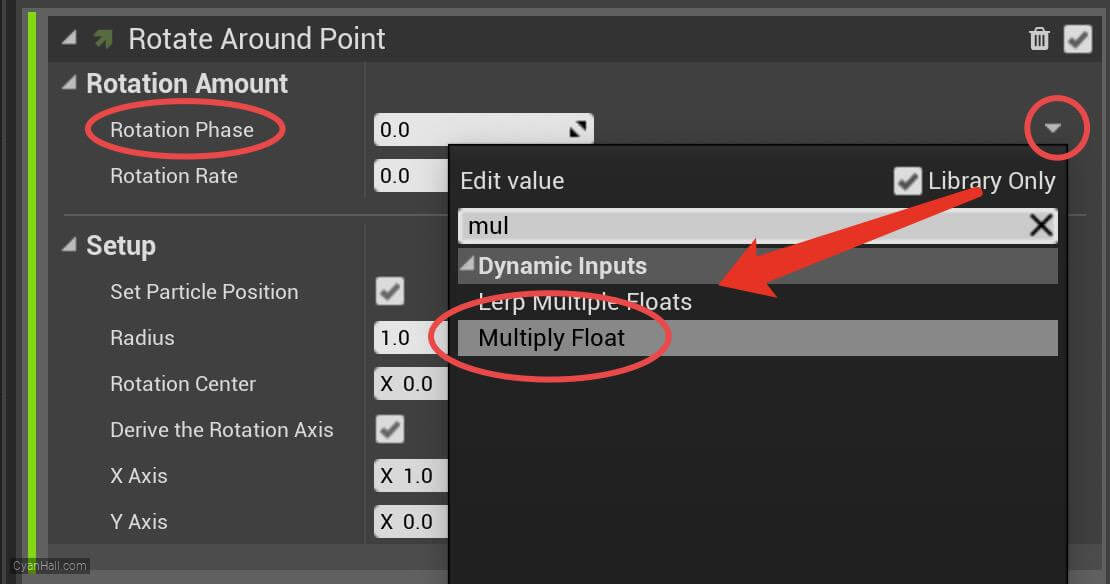
23.
Rotate Around Point
Rotation Phase is an offset to the accumulated rotation value. This can be used to randomize or manually control each particle's rotation value.
Set the value of A to
Set the value of A to
RibbonLinkOrder 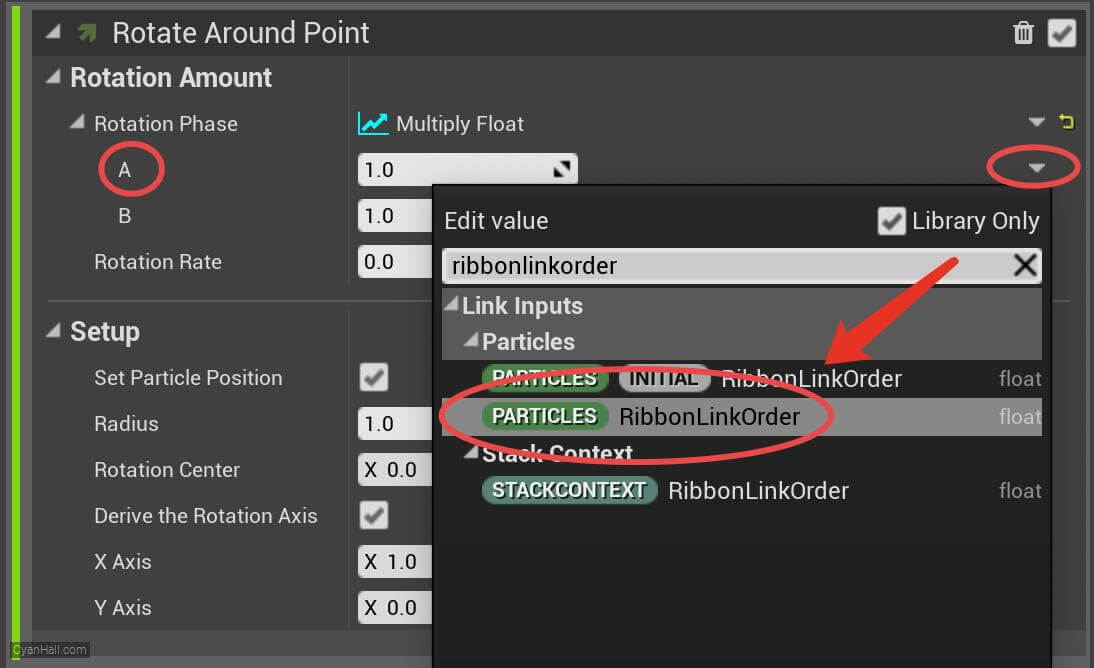
24.
Rotate Around Point
1. Set the value of B to
2. Set the value of Rotation Rate to
3. Set the value type of Radius to
52. Set the value of Rotation Rate to
-1.3. Set the value type of Radius to
New Expression. 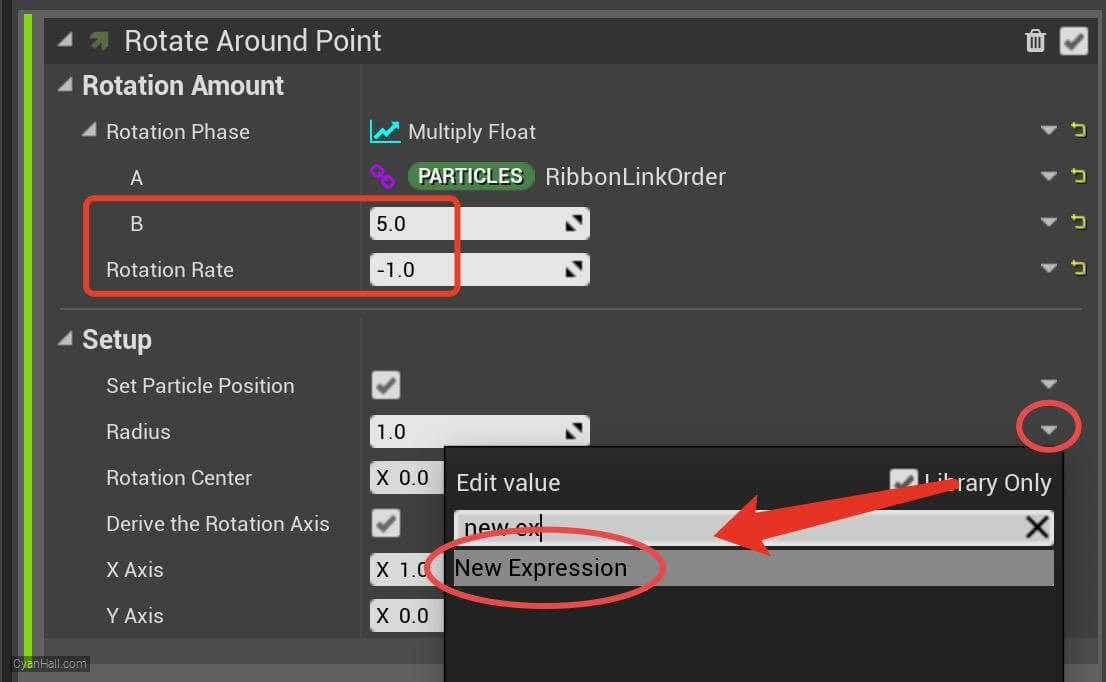
25.
Rotate Around Point
1. Set the value of Radius to
2. Set the value of Rotation Center to
(1.0f-(abs((Particles.RibbonLinkOrder)-0.5f)*2.0f))*500.0f2. Set the value of Rotation Center to
Particles.Position 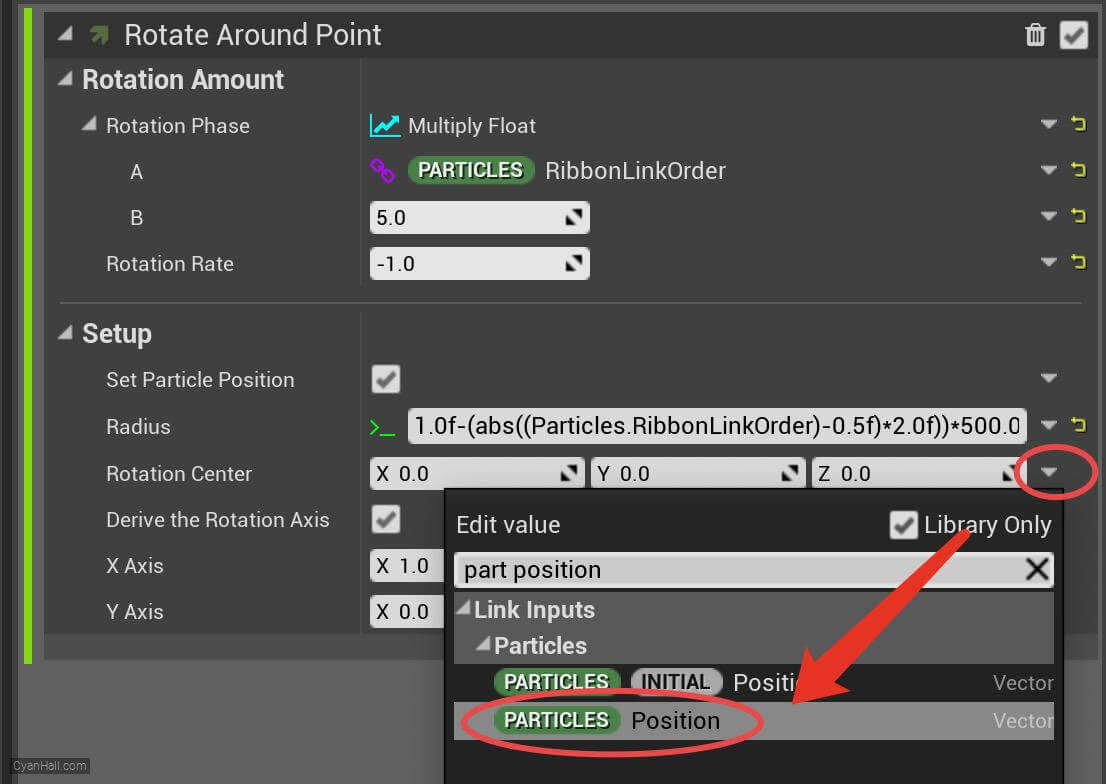
26.
Rotate Around Point
Set the value of the X Axis to
Particles.BeamSplineNormal 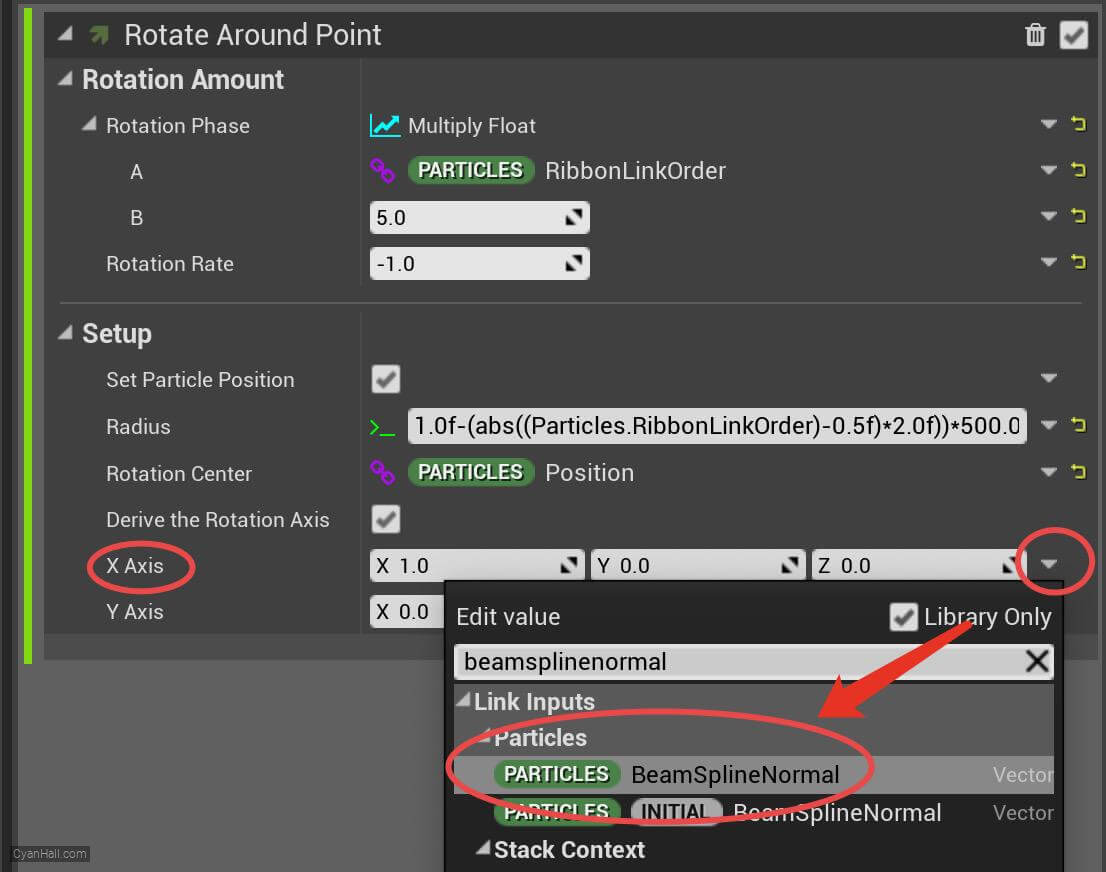
27.
Rotate Around Point
Set the value of the Y Axis to
Particles.BeamSplineBinormal 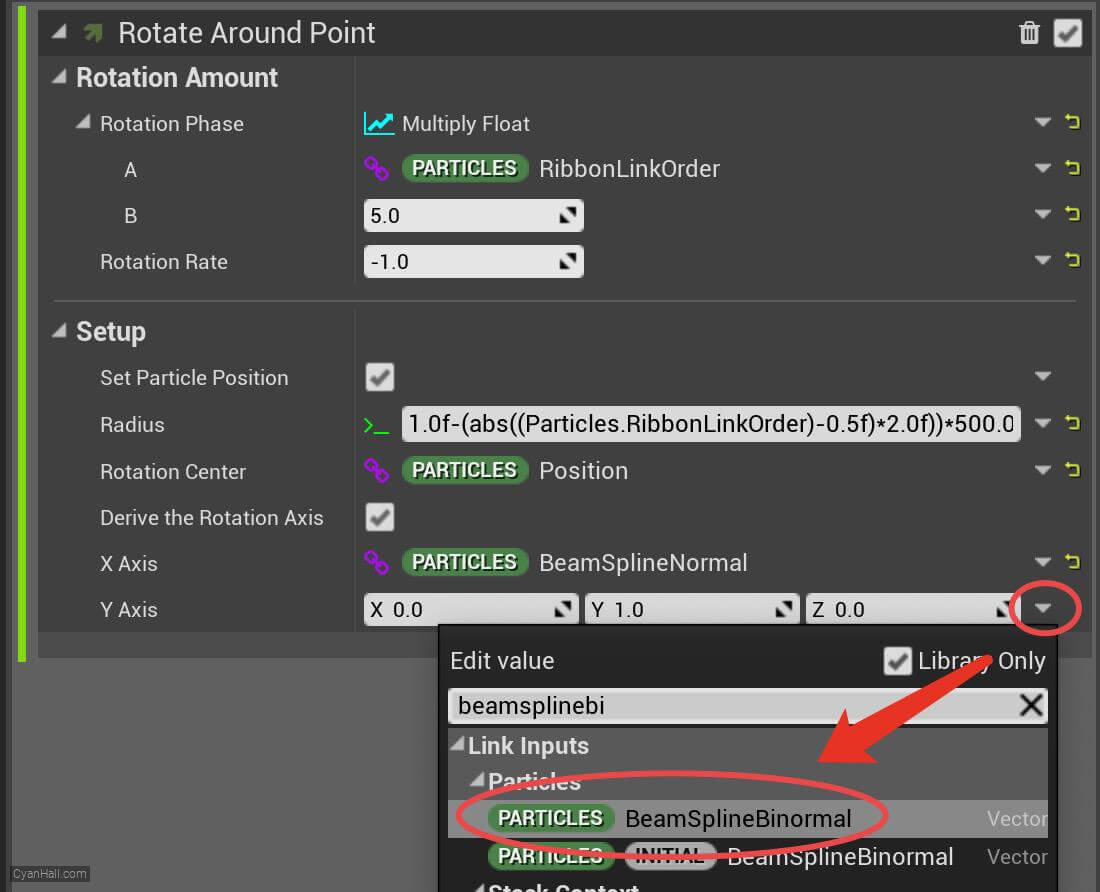
28.
Color
Add
Color module to the Particle Update section. 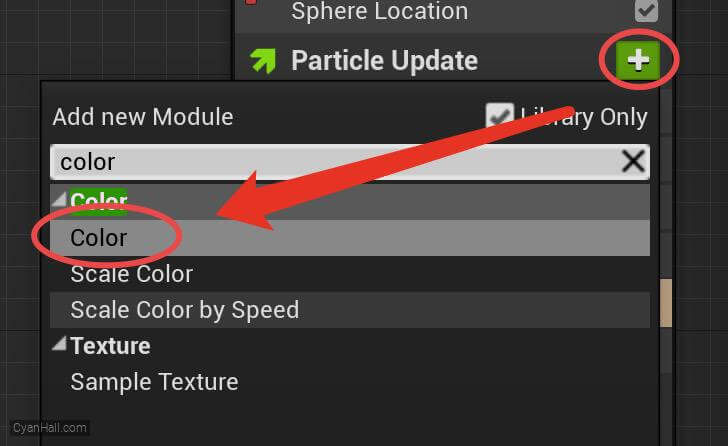
29.
Color
Set the value type of
Color to Lerp Linear Color 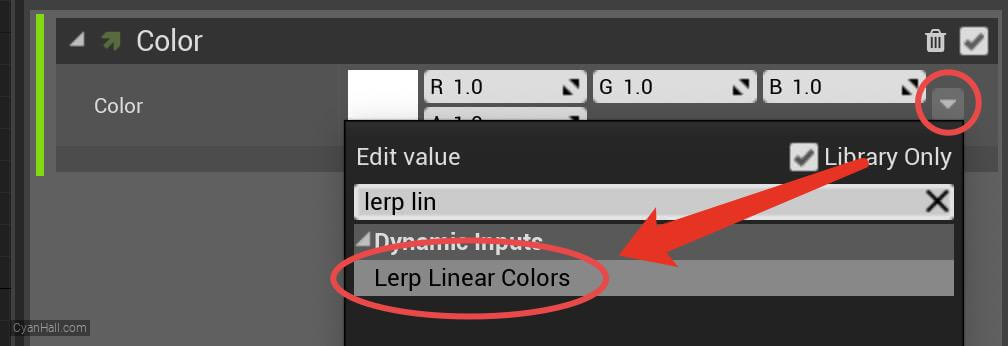
30.
Color
1. Set the StartColor to
2. Set the LerpFactor to
(0, 0.3, 3, 1) and the EndColor to (1.25, 0, 0.05, 1).2. Set the LerpFactor to
RibbonLinkOrder 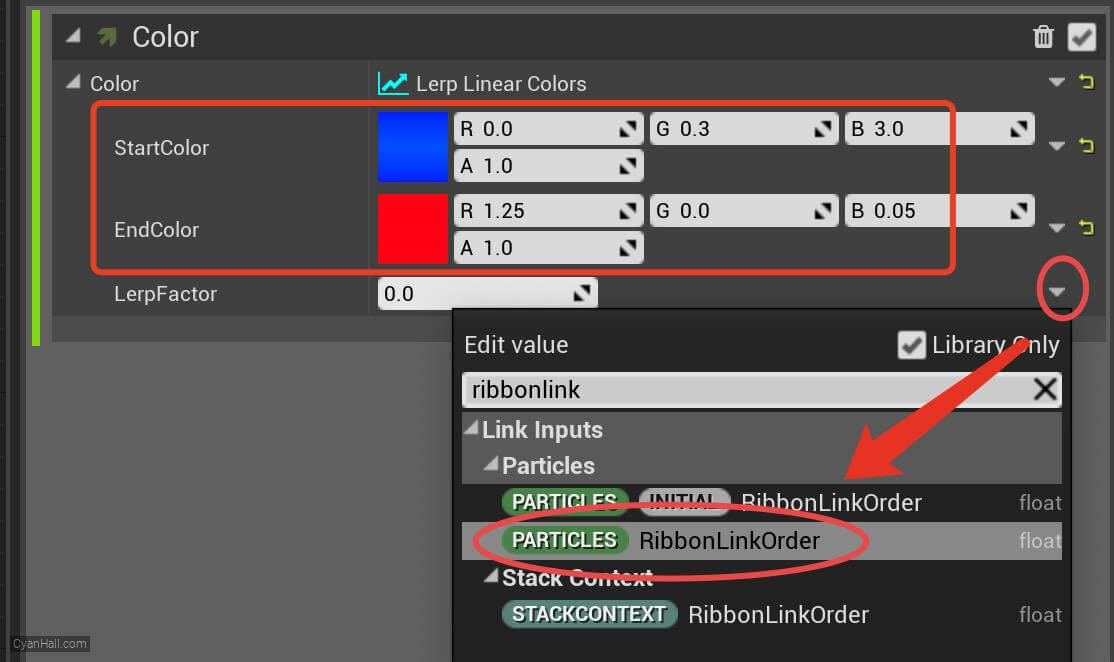
31.
Remove Sprite Renderer
Select
Sprite Renderer, right-click, and select Delete. 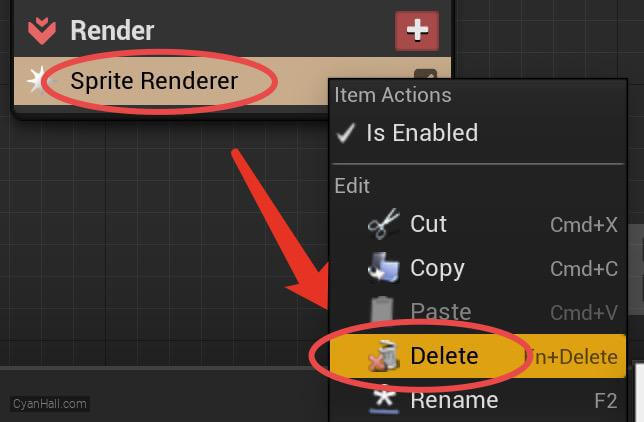
32.
Ribbon Renderer
Add
Ribbon Renderer module to the Render section. 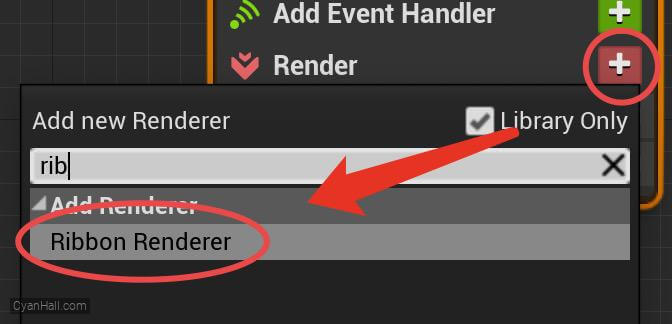
33.
Ribbon Renderer
Set the value of Material to
DefaultRibbonMaterial 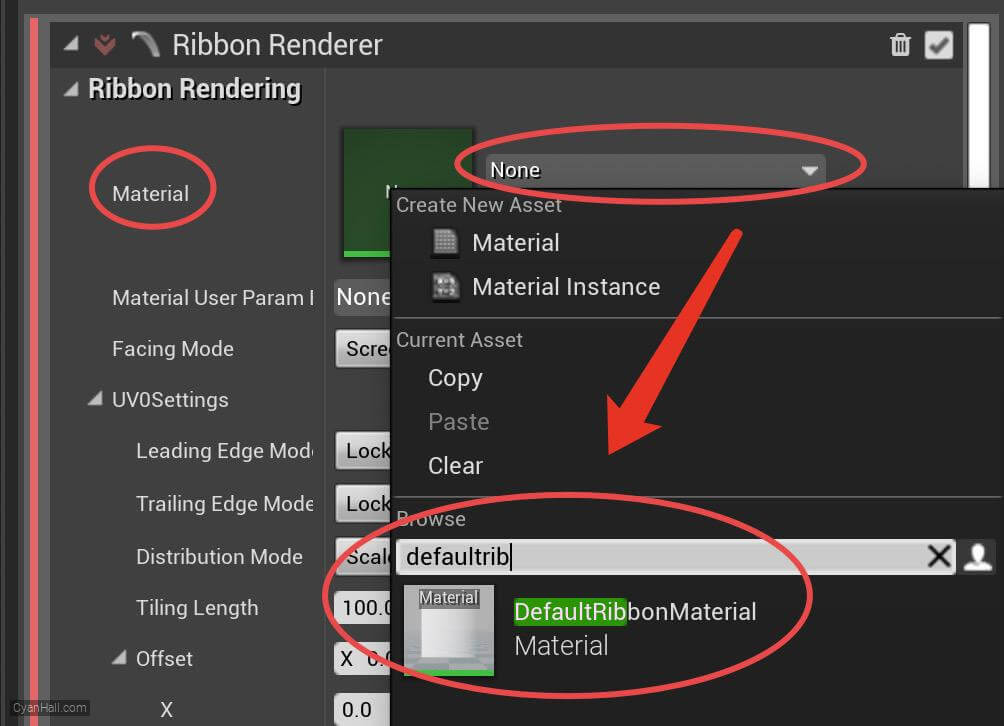
34.
🎉 Finish! 🎉
👉  Star me if it’s helpful.
Support Me: Patreon
Follow Me: Twitter, Reddit, Zhihu, Bilibili
Support Me: Patreon
Follow Me: Twitter, Reddit, Zhihu, Bilibili
