Version: 4.26, 中文
Created: 2021-01-19, Updated: 2021-03-25
Author: Cyanhall
👉 Star me if it’s helpful.
Created: 2021-01-19, Updated: 2021-03-25
Author: Cyanhall
👉
1.
Niagara Introduction
Unreal's Next Generation VFX Tool. Fully programmable VFX sim with node based modular behaviors, sequencer timeline, HLSL expression support, and inheritance.
Note: The main content of this tutorial comes from the
Tip: Use ⬆️ ⬇️ to turn the page up and down. We recommend browsing with a large screen for a better reading experience.
Note: The main content of this tutorial comes from the
Content Examples that come with Unreal EngineTip: Use ⬆️ ⬇️ to turn the page up and down. We recommend browsing with a large screen for a better reading experience.

Full Tutorials:
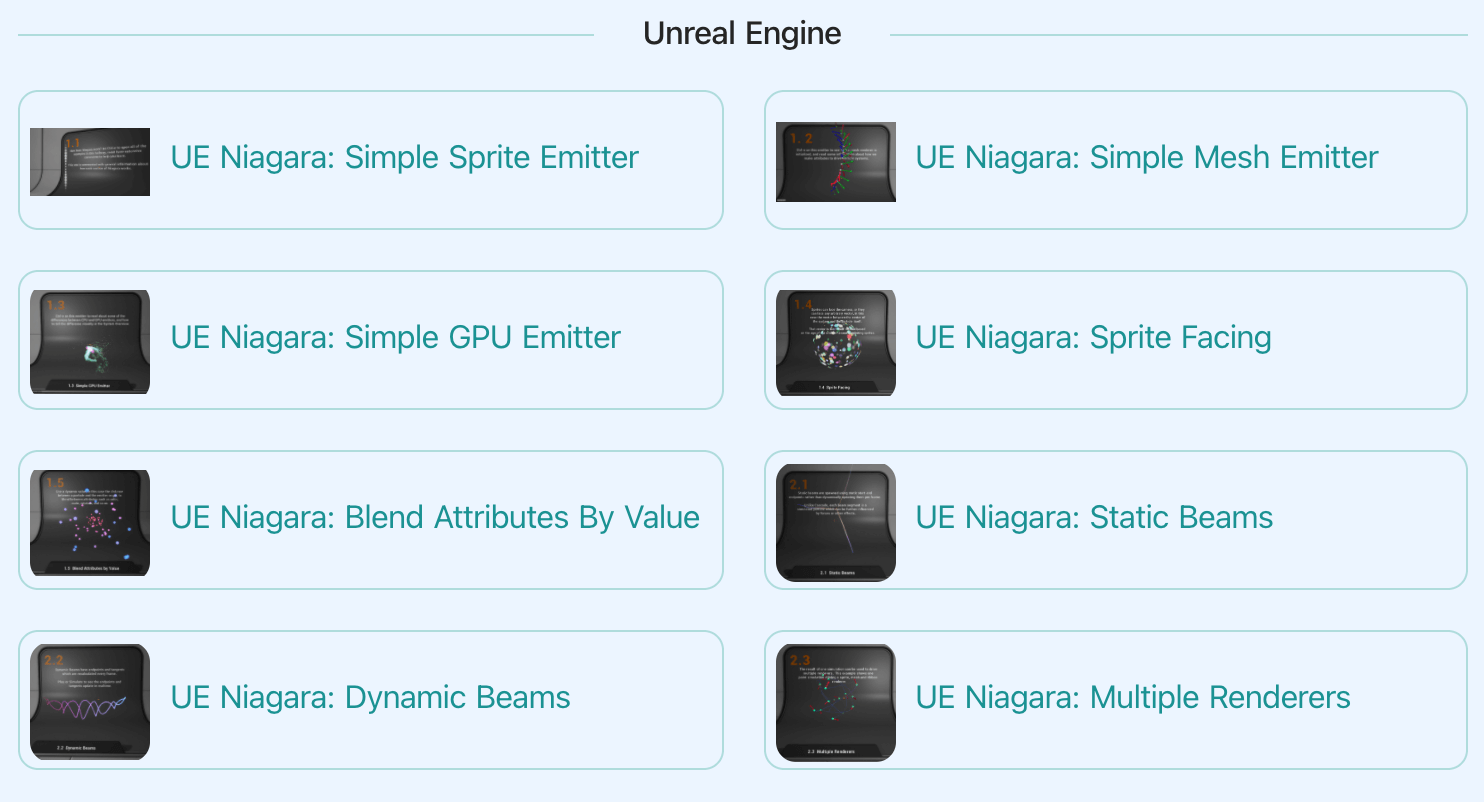
1. UE Niagara: Simple Sprite Emitter
2. UE Niagara: Simple Mesh Emitter
3. UE Niagara: Simple GPU Emitter
4. UE Niagara: Sprite Facing
5. UE Niagara: Blend Attributes By Value
6. UE Niagara: Static Beams
7. UE Niagara: Dynamic Beams
8. UE Niagara: Multiple Renderers
9. UE Niagara: Location Events
10. UE Niagara: Expressions
3.
How does Niagara work?
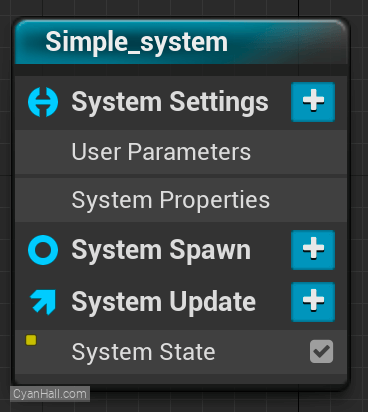
Niagara runs a series of scripts. We refer to them as Stacks. First, is this blue
It controls the overall lifecycle of a
Attributes created here are accessible to every other emitter and particle in the system, as data flows from system->emitters->particles.
System Script. It controls the overall lifecycle of a
Particle System. System Spawn controls what happens on the very first frame the system spawns, System Update is the logic which runs every frame thereafter.Attributes created here are accessible to every other emitter and particle in the system, as data flows from system->emitters->particles.
4.
How does Niagara work?
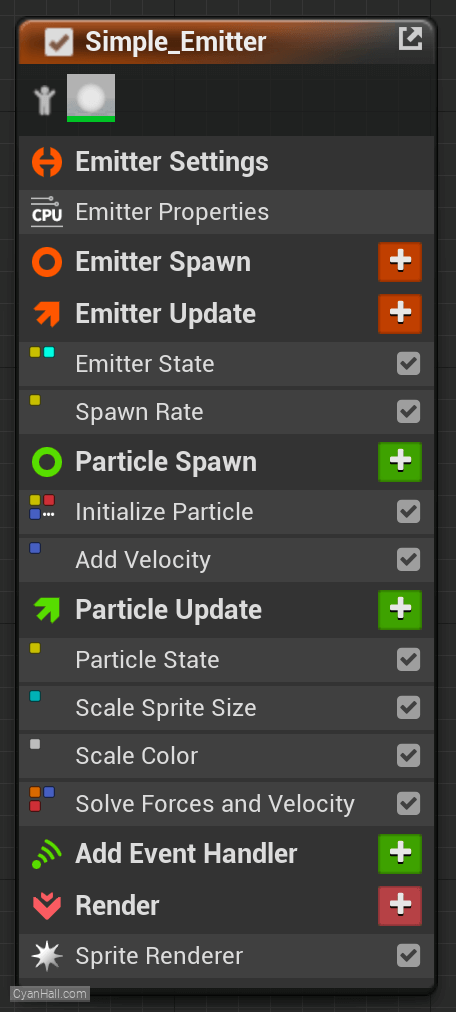
Next, this Orange section executes for every emitter in the system. Each emitter has a similar spawn and update script. This is where we control the life cycle of each individual emitter in the system. Am I looping? Do I only play once? Am I allowed to spawn particles? If so, how many? These are the types of questions the Emitter Scripts are trying to answer.
5.
How does Niagara work?
Then, these green Particle scripts run independently for every single individual particle in the emitter.
Particle Spawn for the first frame of a particle's life, Particle update for every frame thereafter.There are many built in behaviors (called Modules) in both particle spawn and particle update, accessible via the colored "+" box next to each script header, or by right clicking a module and choosing "insert above" or "insert below".
6.
How does Niagara work?
Lastly, we choose a renderer, in this case a sprite renderer. We can assign a material and choose from options like velocity alignment or camera facing.
7.
Let's start the reconstruction
Right click and select
FX => Niagara System to create. 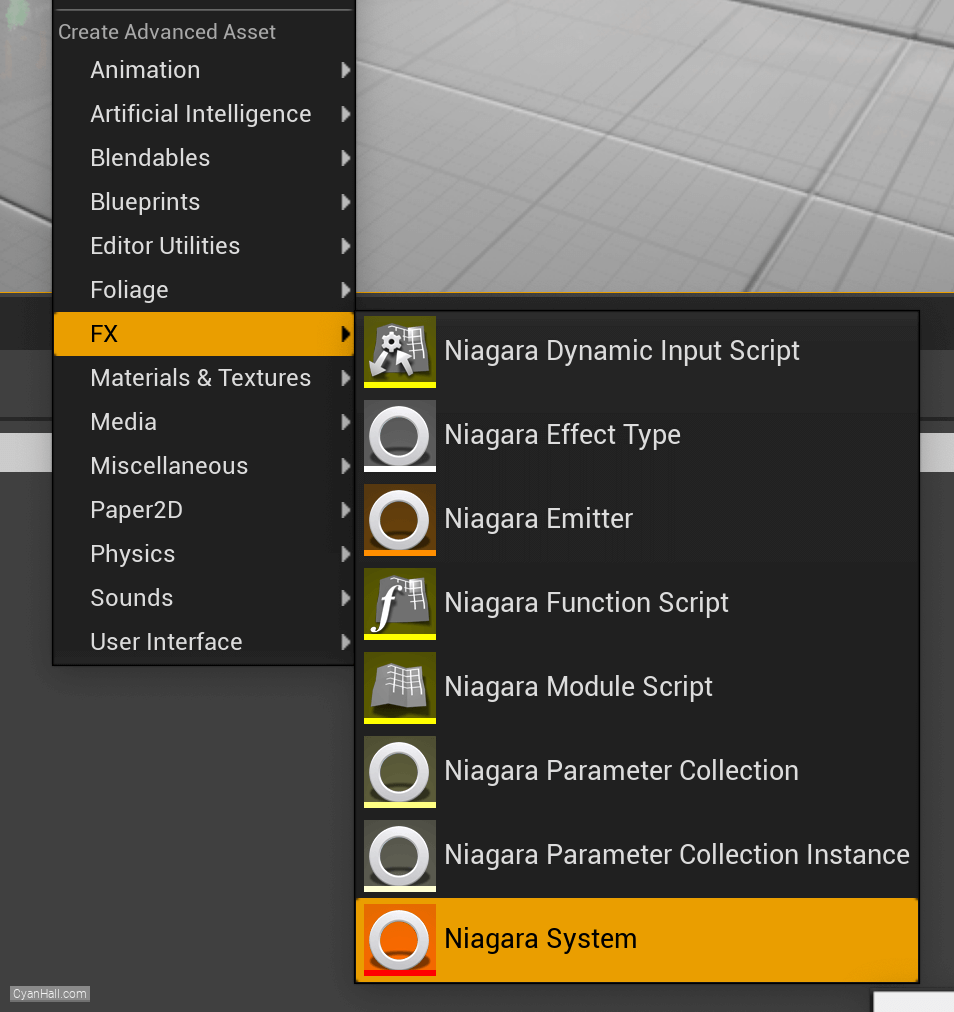
8.
Create Niagara System
Select
Empty template, click + and Finish 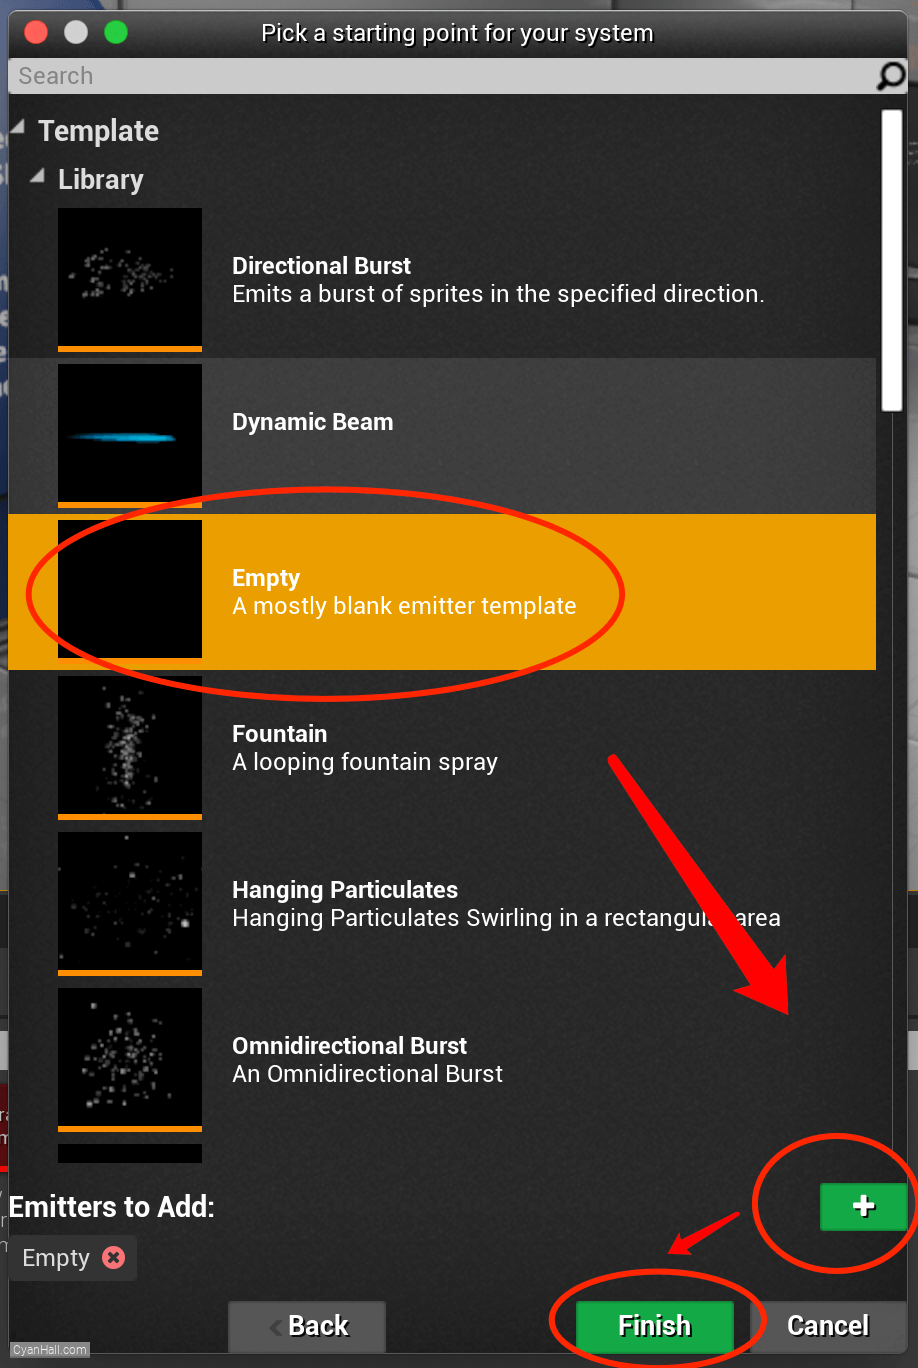
9.
Create Niagara System
As a result, we get a
Niagara System asset, click to open it. 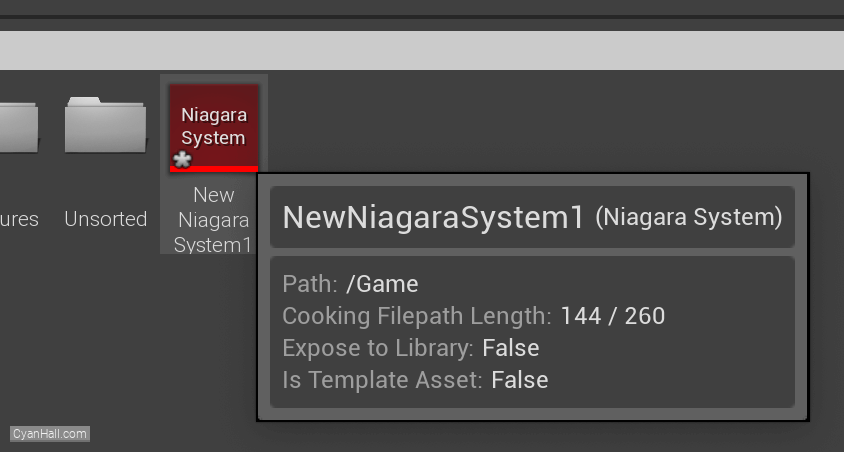
10.
Empty Niagara System
You can see that we have an empty Niagara system.

11.
Spawn Rate
Click on the
+ sign to the right of the Emitter Update to add the Spawn Rate module.Spawn Rate: Number of particles per second to spawn. 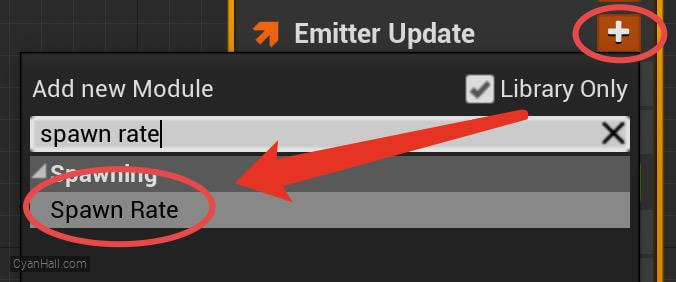
12.
Spawn Rate
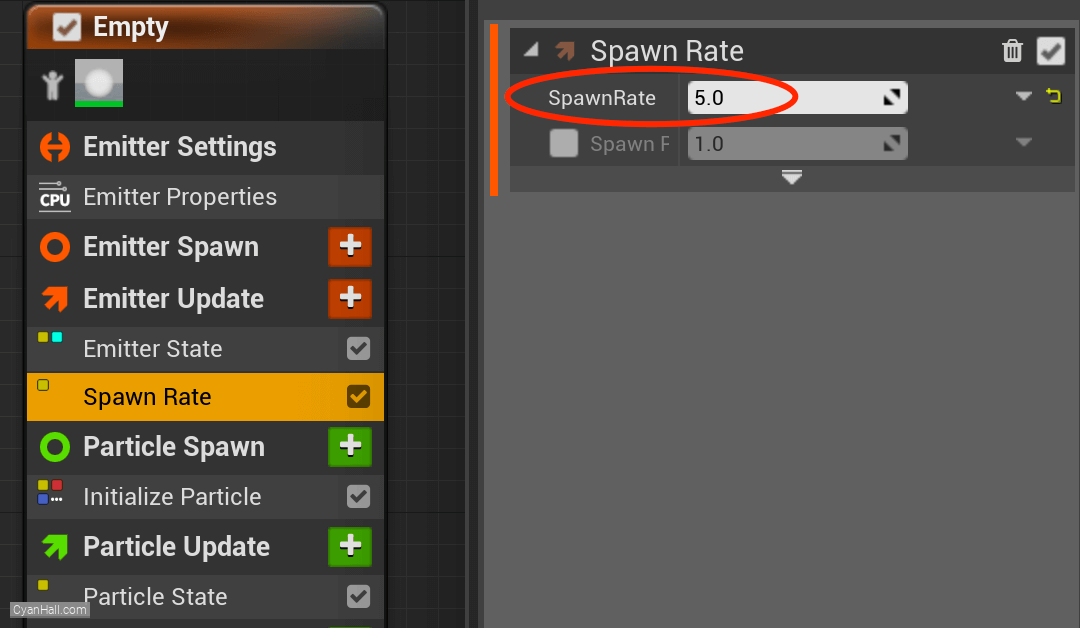
Set the
Spawn 5.0 particle per second.
Spawn Rate value to 5.0.Spawn 5.0 particle per second.
13.
Particles Spawn
Set Particles Spawn
Lifetime value to 4. 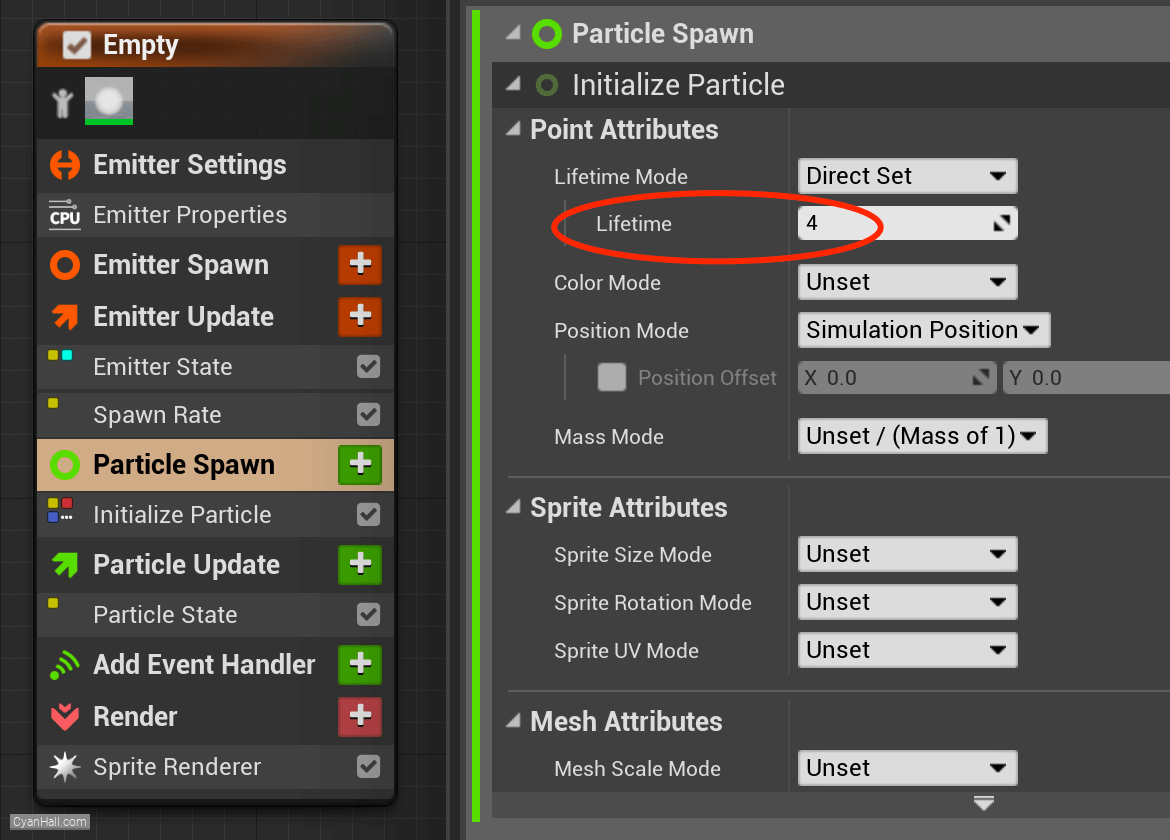
14.
Particles Spawn
Set Particles Spawn
ColorMode to Direct Set. 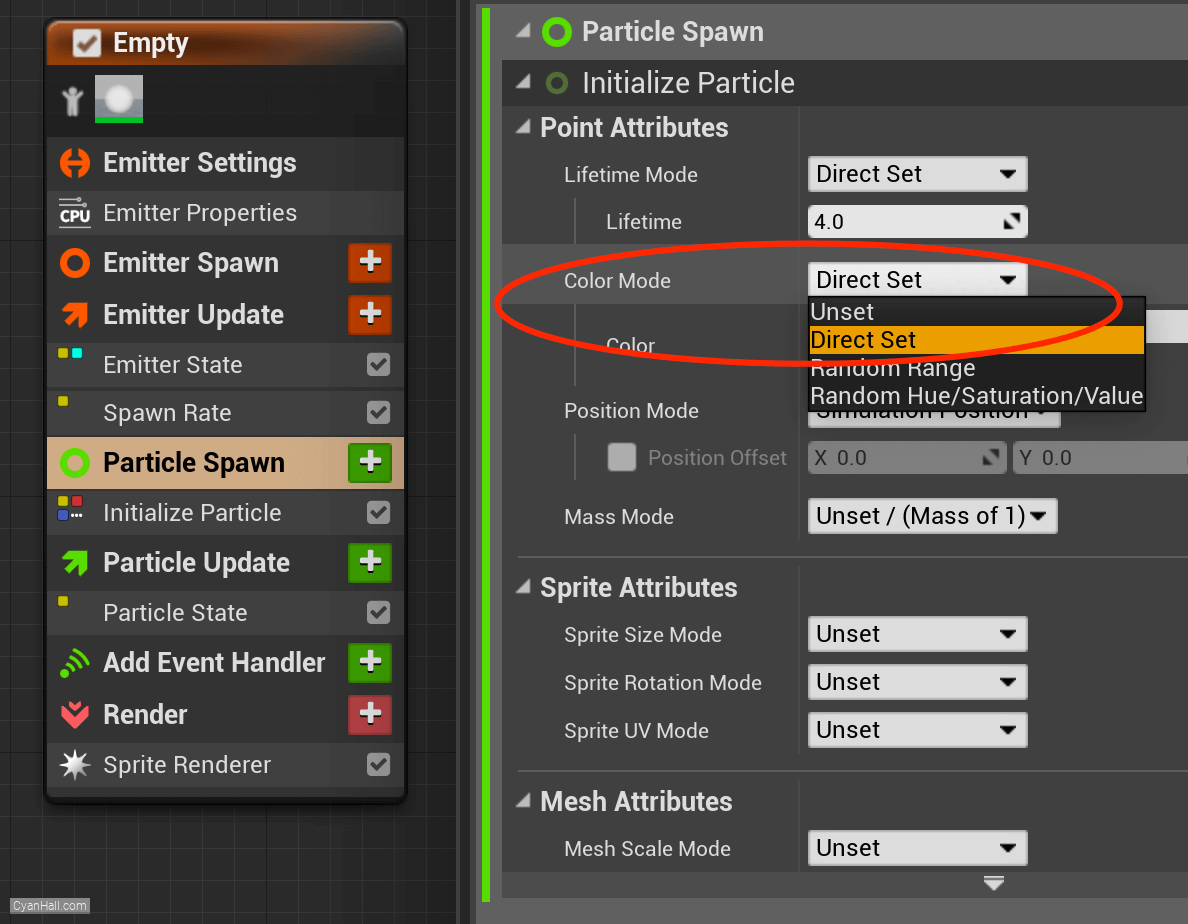
15.
Add Velocity
Add
Add Velocity module to the Particle Spawn section. 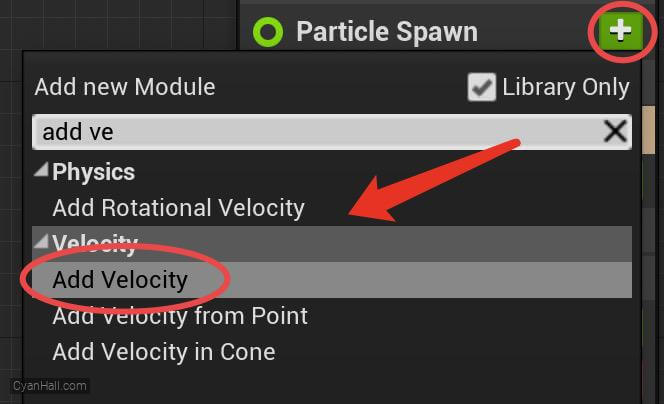
16.
Add Velocity
Click the first
Fix issue button to add its dependency on the SolveForcesAndVelocity module. 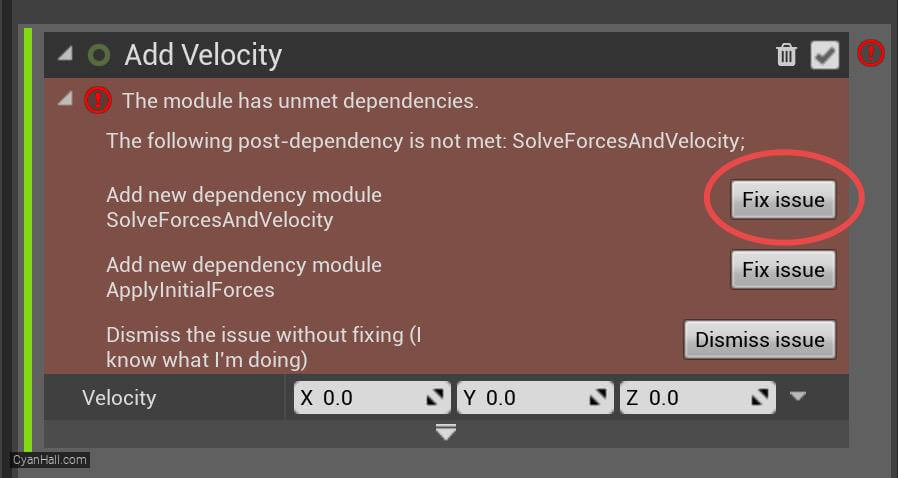
17.
Add Velocity
Set the
Z of the velocity to 40. 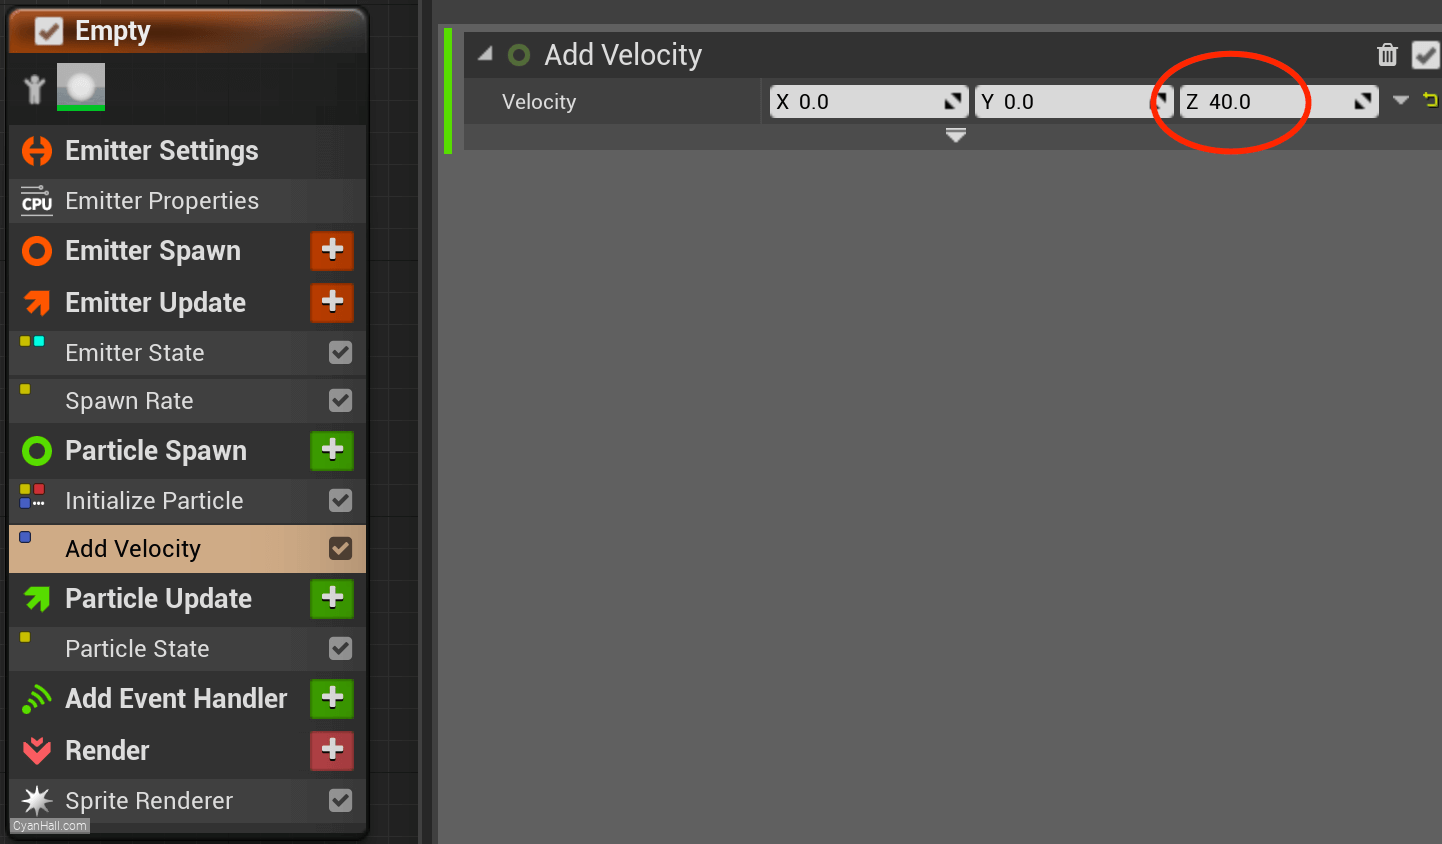
18.
Scale Sprite Size
Add the
Scale Sprite Size module to the Particles Update section. 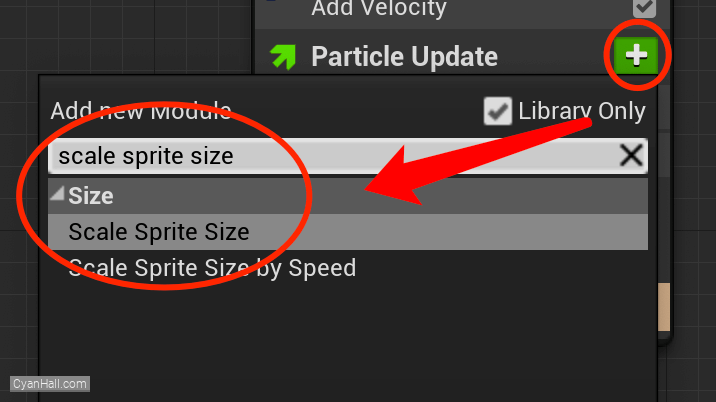
19.
Scale Sprite Size
Edit the
Scale Factor's value to Vector 2DFrom Float. 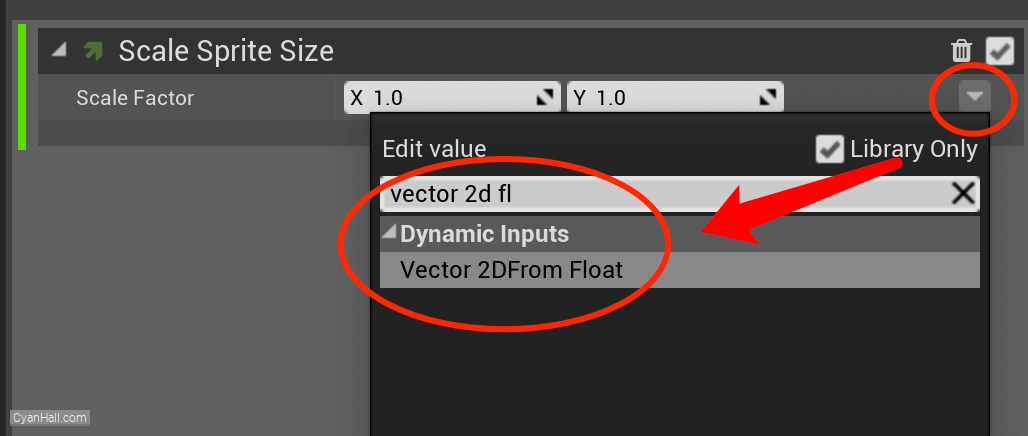
20.
Scale Sprite Size
Set its value type to
Float from Curve. 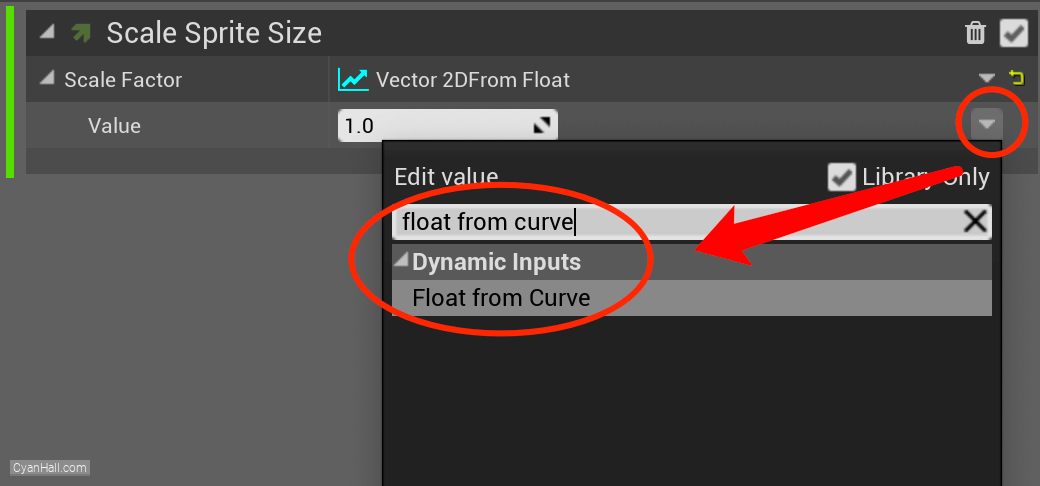
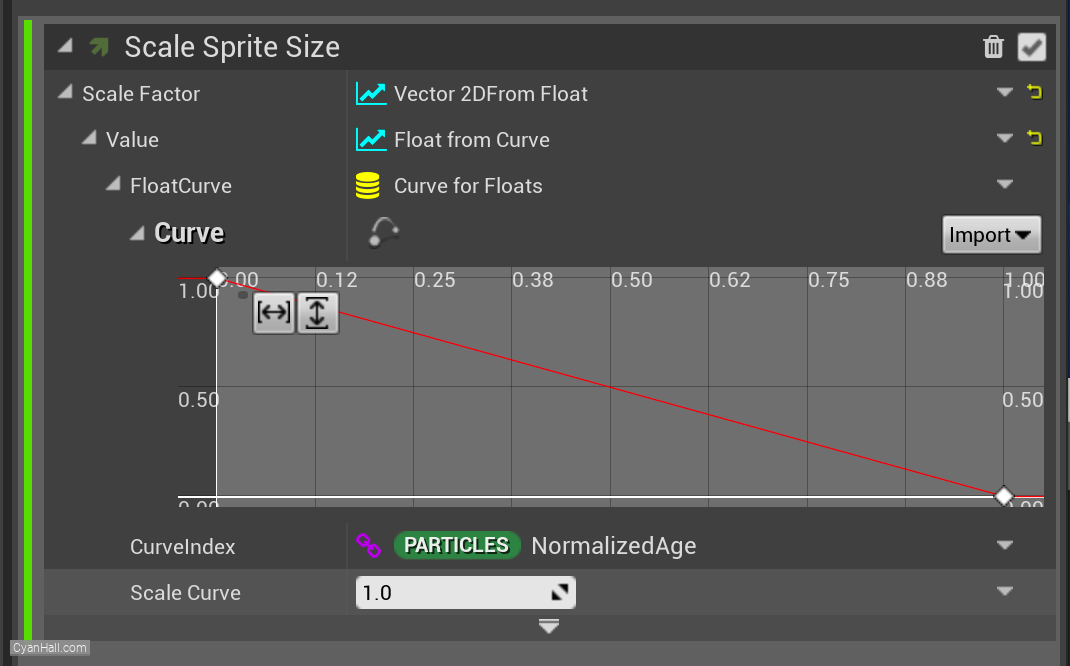
21.
Scale Sprite Size
Edit this curve to control its value over time
22.
Scale Sprite Size
Select the first point and drag it to the bottom.
Note: Here you can also select this point and directly set its
Note: Here you can also select this point and directly set its
Time to: 0 and Value to 0. 
23.
Scale Sprite Size
At the bottom center of the chart, right click and select
Add key to Curve. 
24.
Scale Sprite Size
Set the
Time of the newly added point to 0.5 and the Value to 0.5. 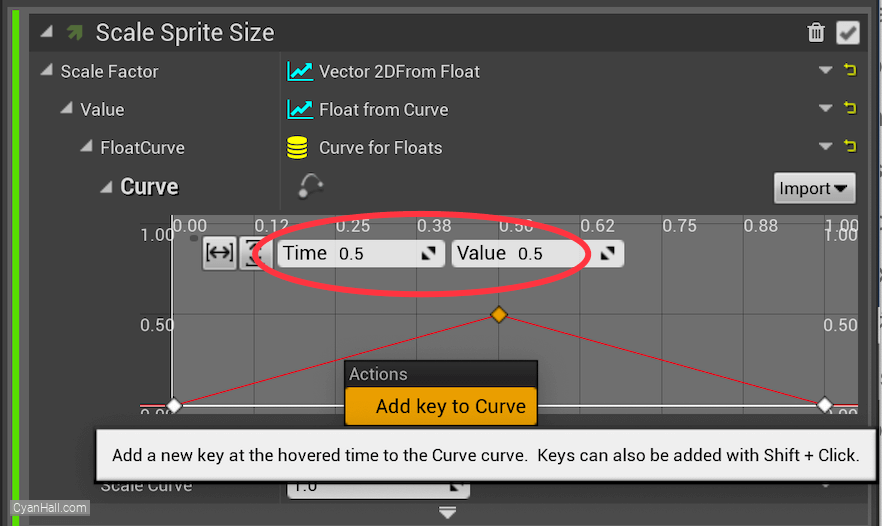
25.
Scale Sprite Size
In the same way, add two points: (time
Then select each point, right-click, and select
0.25, value 1), (time 0.75, value 1).Then select each point, right-click, and select
Auto. 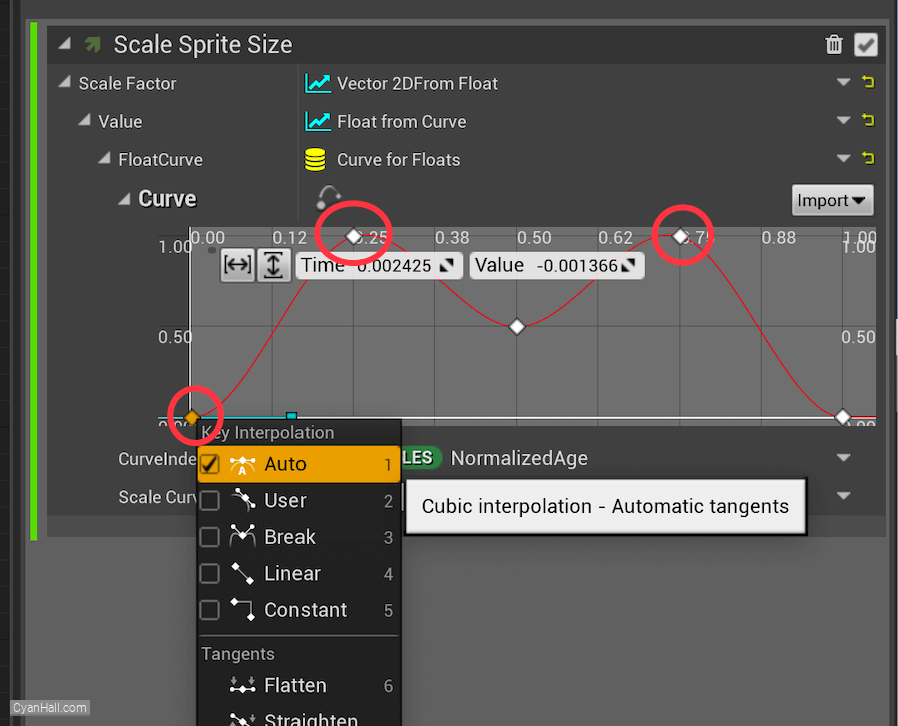
26.
Scale Color
Add
Scale Color module to the Particle Update section. 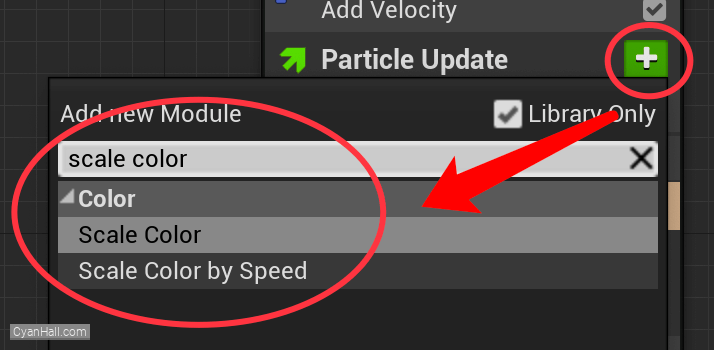
27.
Scale Color
Set the value type of
Scale Alpha to Float from Curve 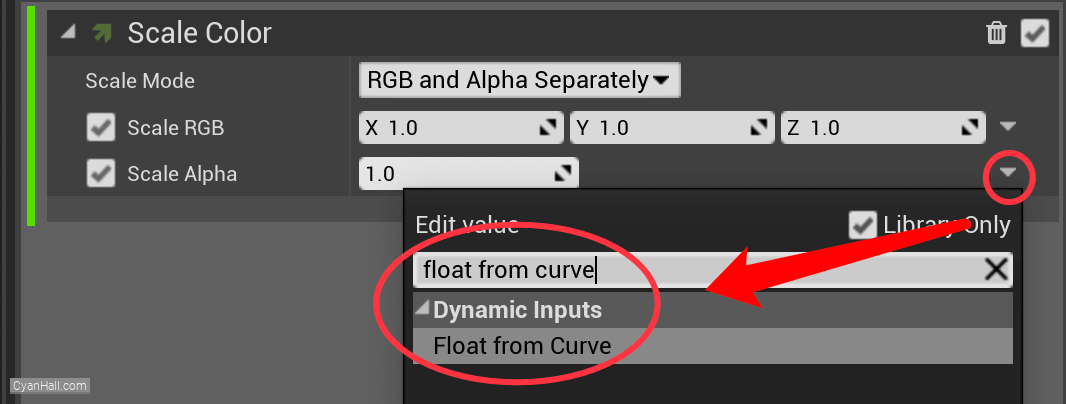
28.
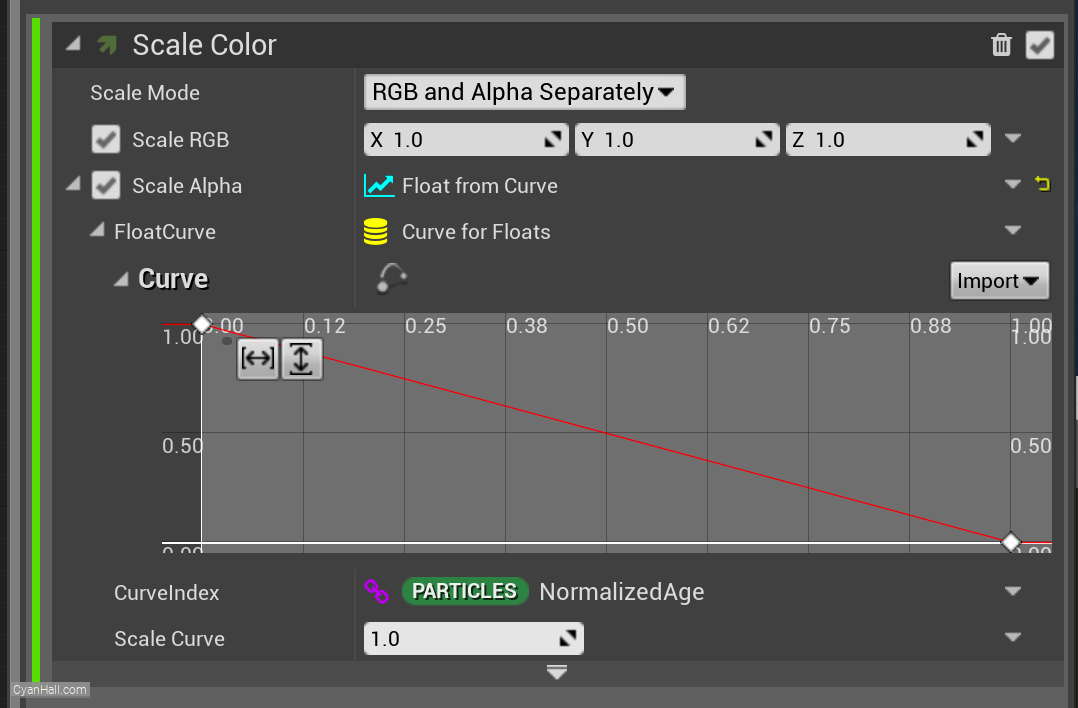
Scale Color
Get a chart that has been set up before.
29.
Scale Color
Set the first point (time
Then select each point, right-click, and select
0.25, value 1) and add a point (time 0.5, value 1).Then select each point, right-click, and select
Auto. 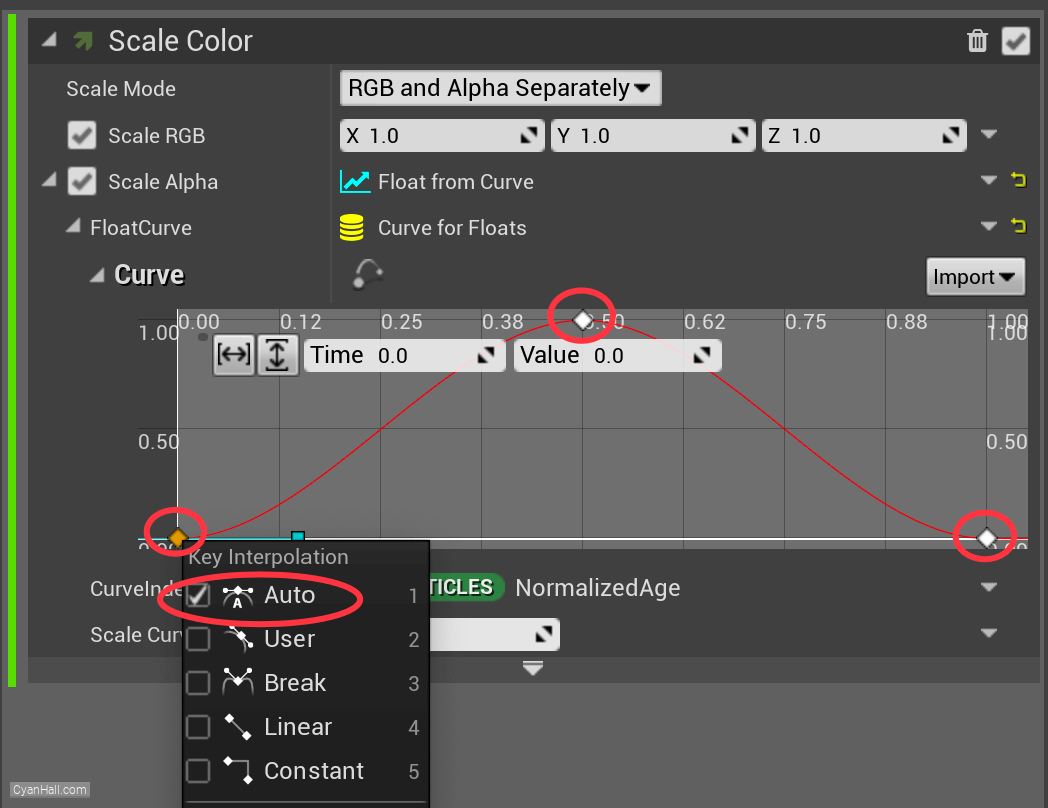
30.
🎉 Finish! 🎉
👉 Star me if it’s helpful.
Support Me: Patreon
Follow Me: Twitter, Reddit, Zhihu, Bilibili
Support Me: Patreon
Follow Me: Twitter, Reddit, Zhihu, Bilibili