Version: 4.26, 中文
Created: 2021-02-15, Updated: 2021-03-25
Author: Cyanhall
👉 Star me if it’s helpful.
Created: 2021-02-15, Updated: 2021-03-25
Author: Cyanhall
👉
1.
Preparation
This is the effect we are going to make in this tutorial.
Note: The main content of this tutorial comes from the
Tip: Use ⬆️ ⬇️ to turn the page up and down. We recommend browsing with a large screen for a better reading experience.
Note: The main content of this tutorial comes from the
Content Examples that come with Unreal EngineTip: Use ⬆️ ⬇️ to turn the page up and down. We recommend browsing with a large screen for a better reading experience.
Full Tutorials:
1. UE Niagara: Simple Sprite Emitter
2. UE Niagara: Simple Mesh Emitter
3. UE Niagara: Simple GPU Emitter
4. UE Niagara: Sprite Facing
5. UE Niagara: Blend Attributes By Value
6. UE Niagara: Static Beams
7. UE Niagara: Dynamic Beams
8. UE Niagara: Multiple Renderers
9. UE Niagara: Location Events
10. UE Niagara: Expressions
3.
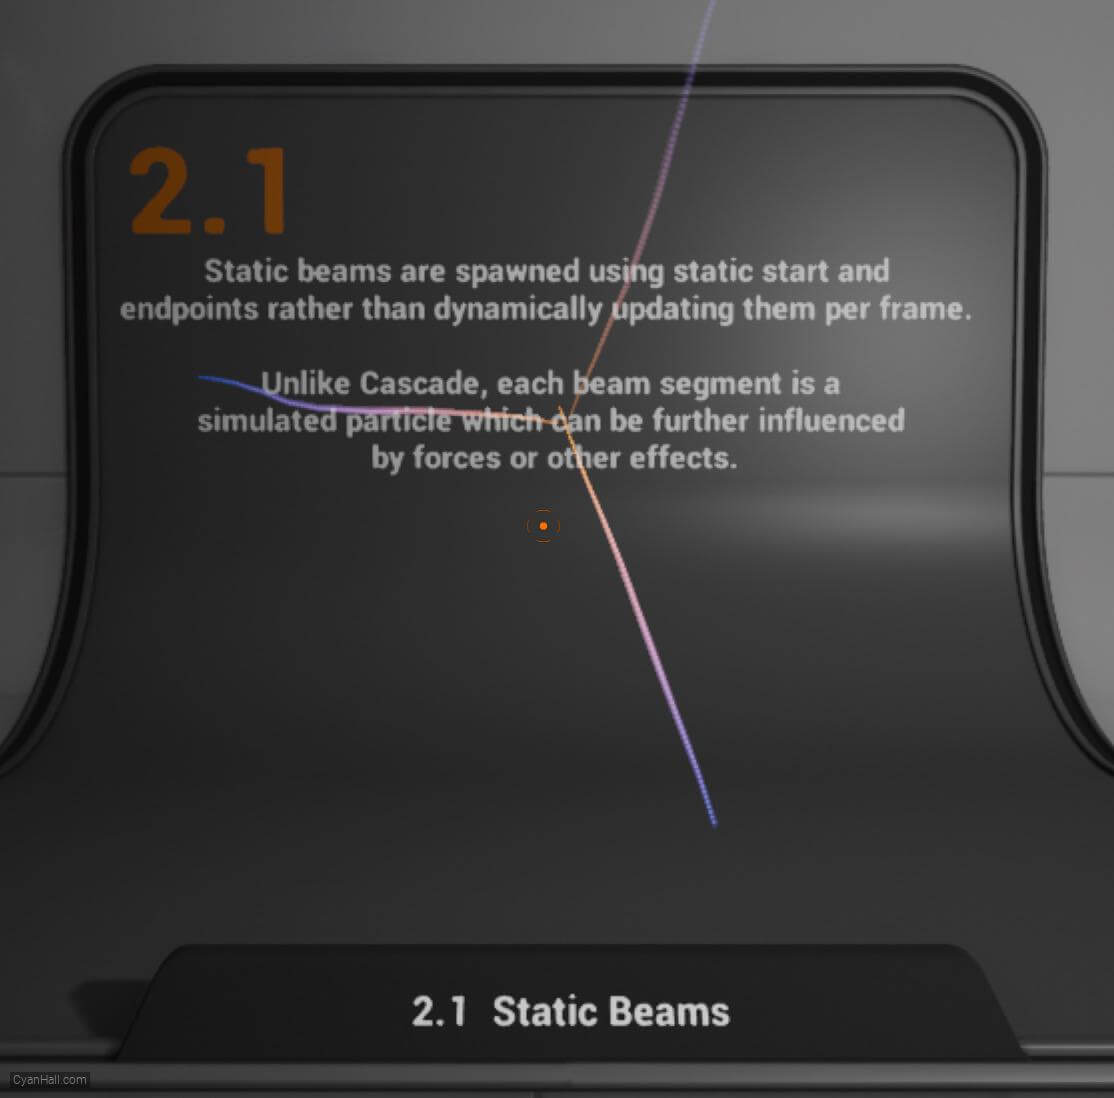
Introduction
Static beams are spawned using static start and endpoints rather than dynamically updating them per frame.
Each beam segment is a simulated particle which can be further influenced by forces or other effects.
Each beam segment is a simulated particle which can be further influenced by forces or other effects.
4.
Let's start the reconstruction
Right click and select
FX => Niagara System to create. 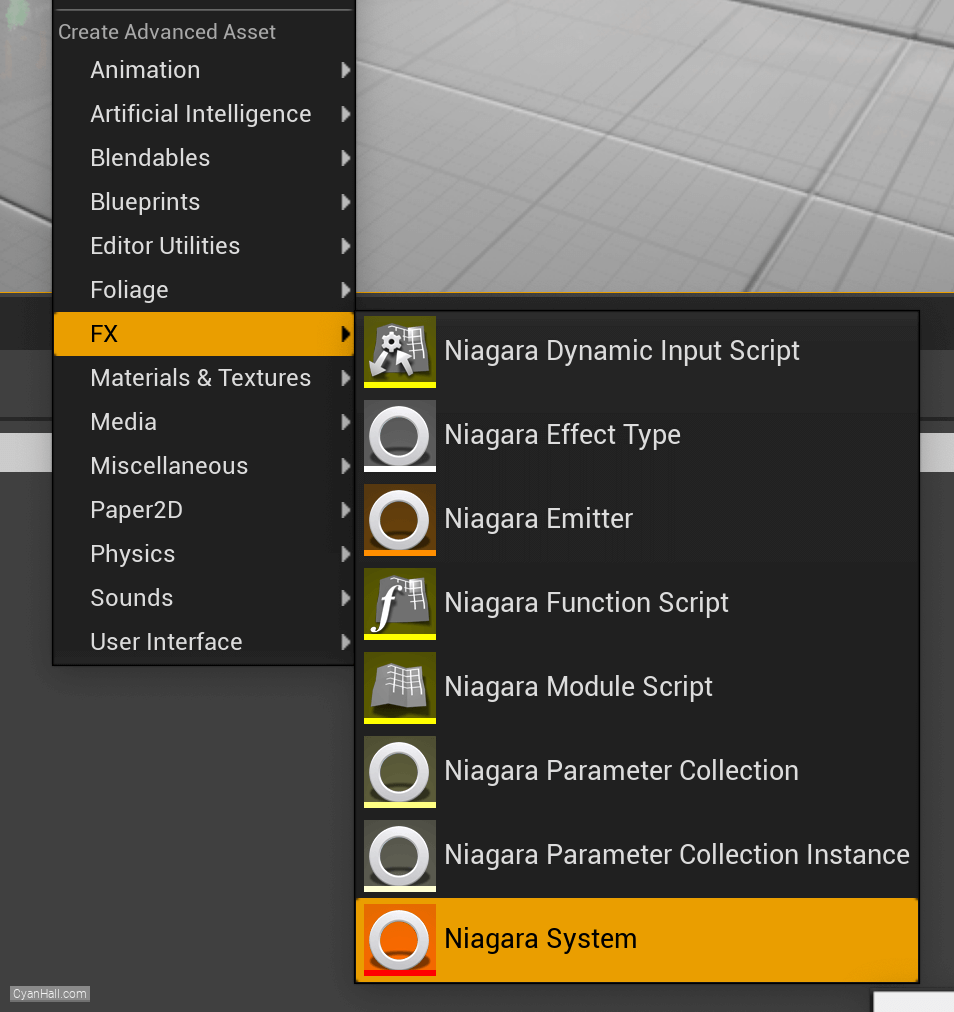
5.
Create Niagara System
Select
Empty template, click + and Finish 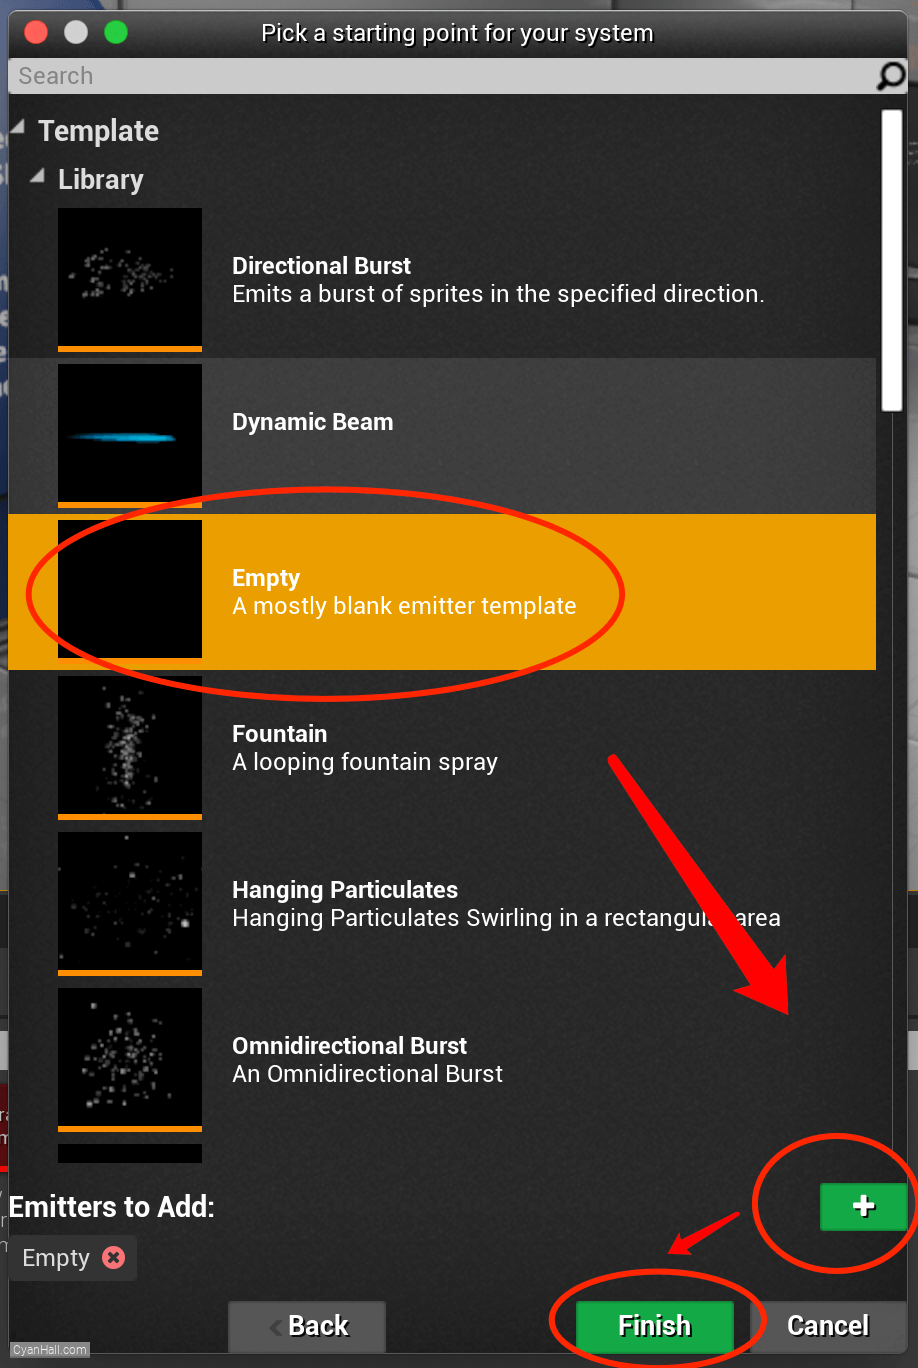
6.
Create Niagara System
As a result, we get a
Niagara System asset, click to open it. 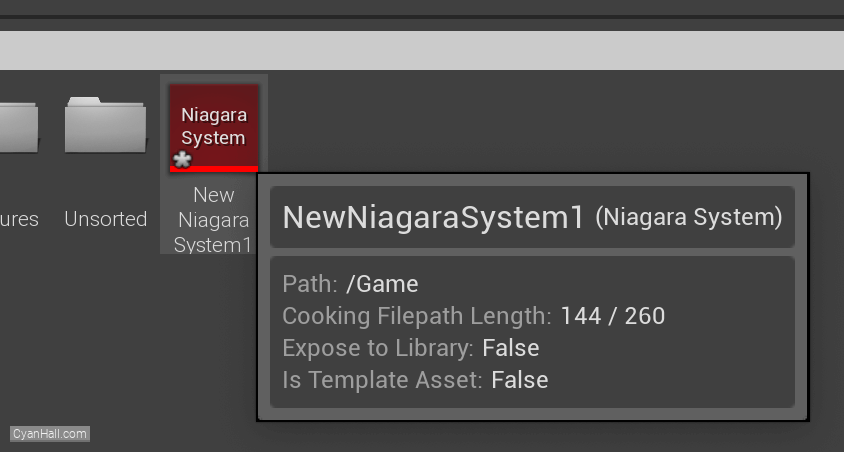
7.
Empty Niagara System
You can see that we have an empty Niagara system.

8.
Life Cycle Mode
Set Life Cycle Mode to
It determines whether the life cycle (Managing looping, age, and death) of the Emitter is calculated by the system that owns it, or by the Emitter itself.
Allowing the owning System to calculate life cycle and pass those values down to child Emitters is a significant optimization in most cases.
Self.It determines whether the life cycle (Managing looping, age, and death) of the Emitter is calculated by the system that owns it, or by the Emitter itself.
Allowing the owning System to calculate life cycle and pass those values down to child Emitters is a significant optimization in most cases.

9.
Beam Emitter Setup
Add
Beam Emitter Setup module to the Emitter Update section. 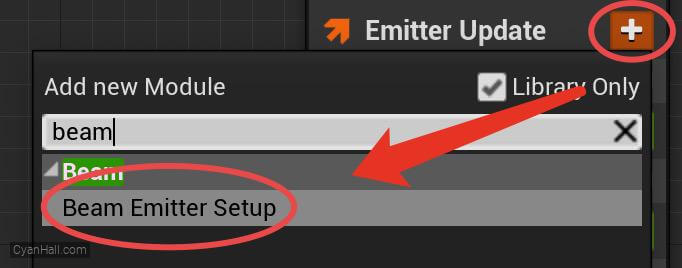
10.
Beam Emitter Setup
Set the value type of
Beam End to Random Vector 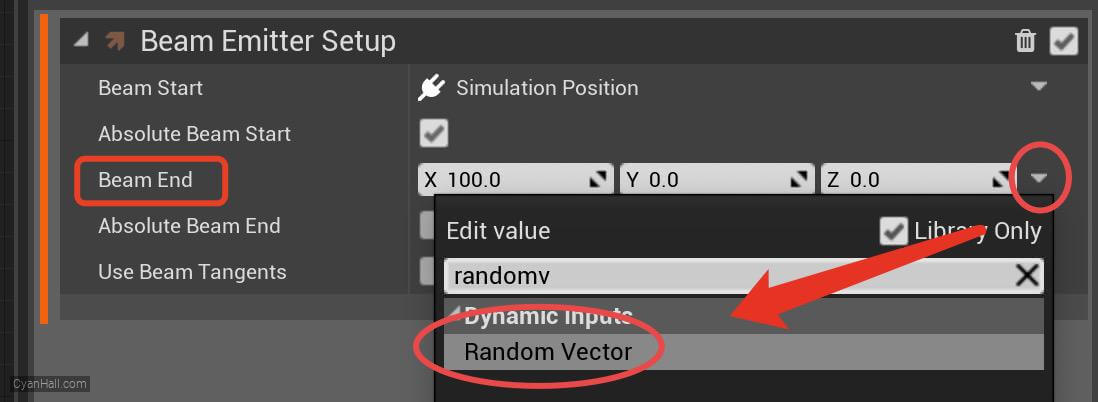
11.
Beam Emitter Setup
Set the value type of
Vector Scale to Random Range Float 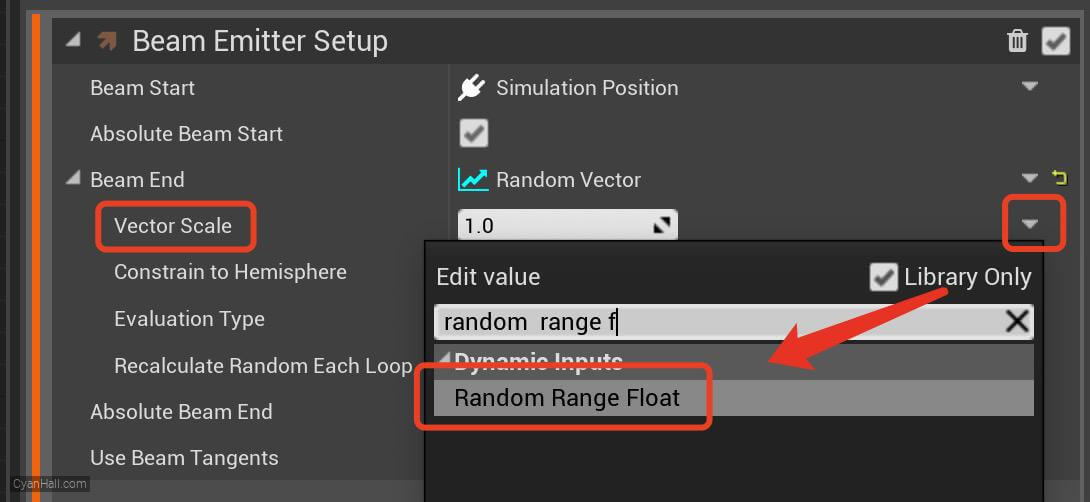
12.
Beam Emitter Setup
1. Set the Minimum value to
2. Set the Elevation Type to
220.0 and the Maximum value to 340.02. Set the Elevation Type to
Every Frame. 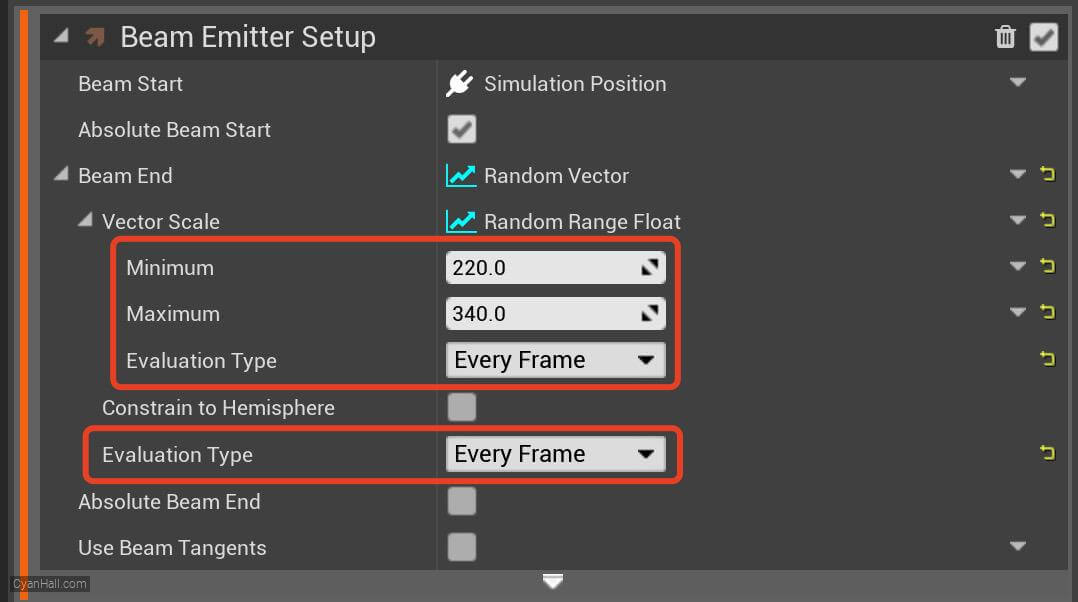
13.
Spawn Burst Instantaneous
Click on the
+ sign to the right of the Emitter Update to add the Spawn Burst Instantaneous module 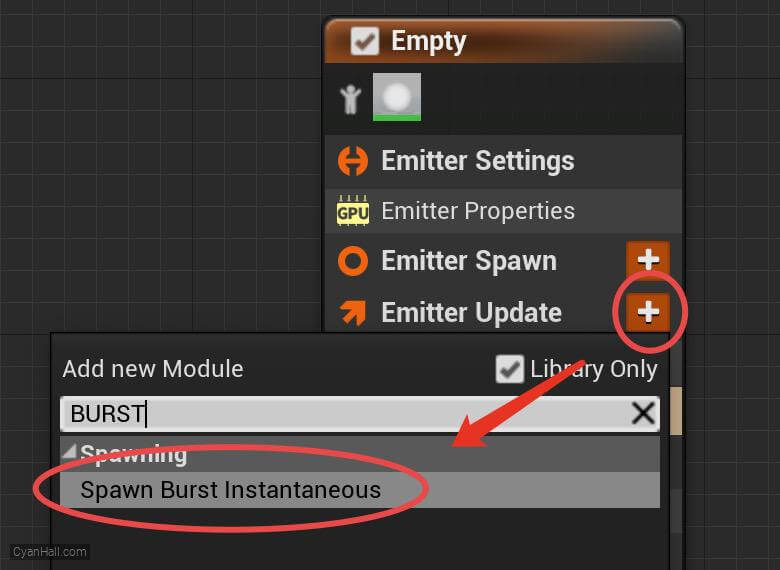
14.
Spawn Burst Instantaneous
Set
Spawn Count to 100.0 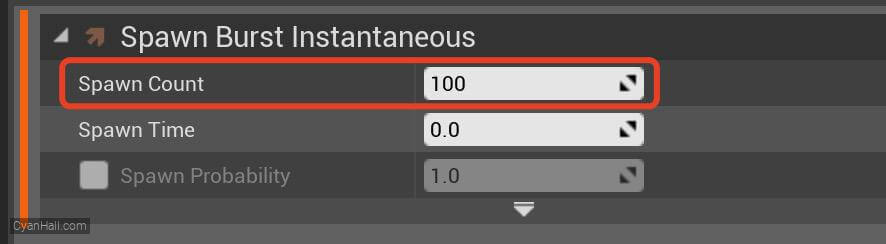
15.
Initialize Particles
Select
1.
2.
Initialize Particles and set:1.
Lifetime to 3.02.
Sprite Size Mode to Uniform 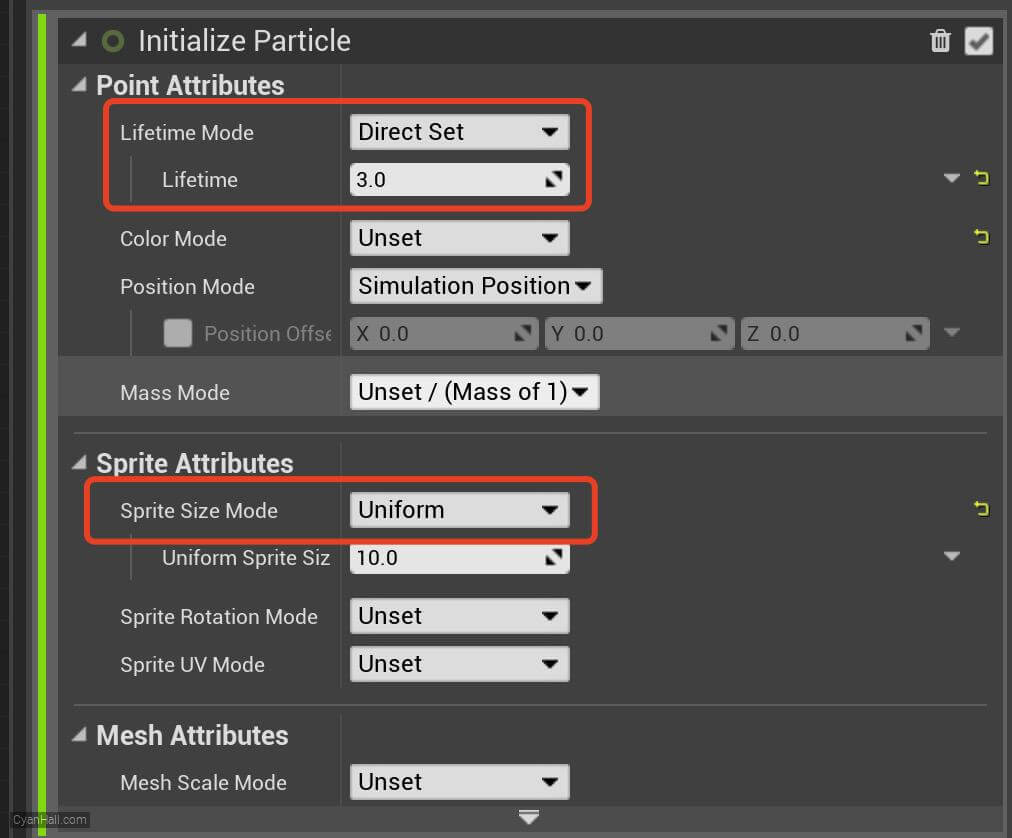
16.
Initialize Particles
Set the value type of
Uniform Sprite Size to Float from Curve 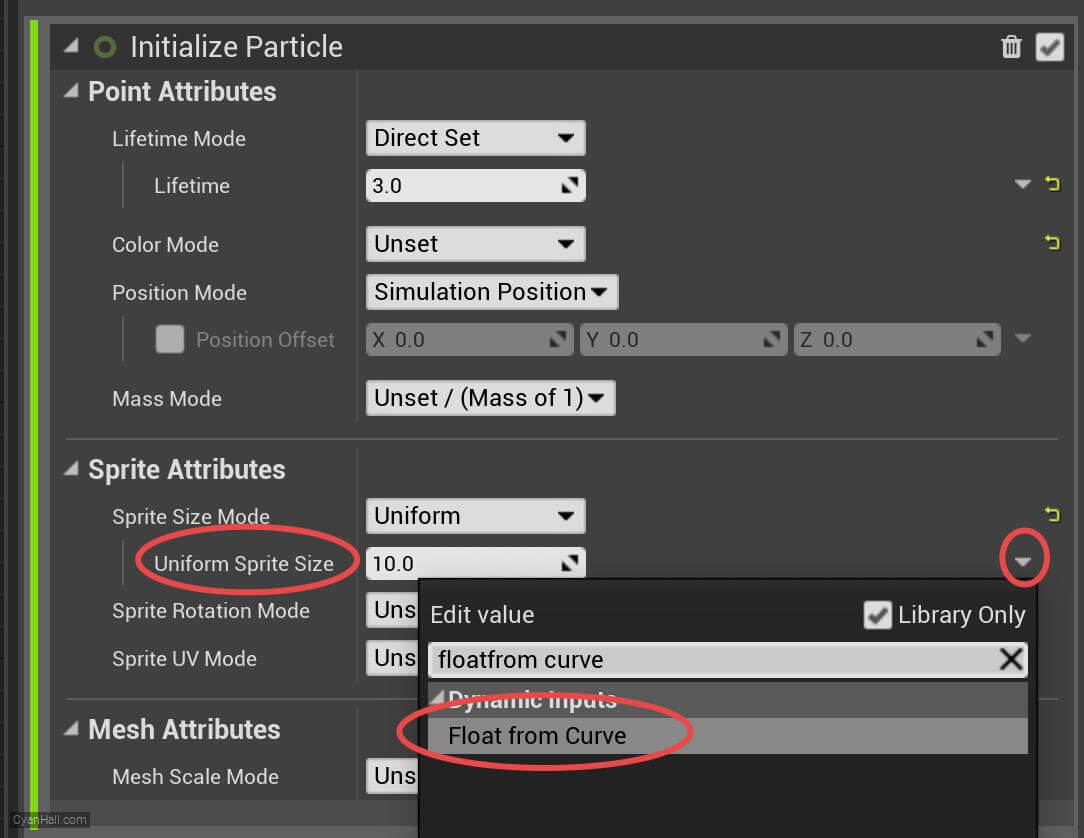
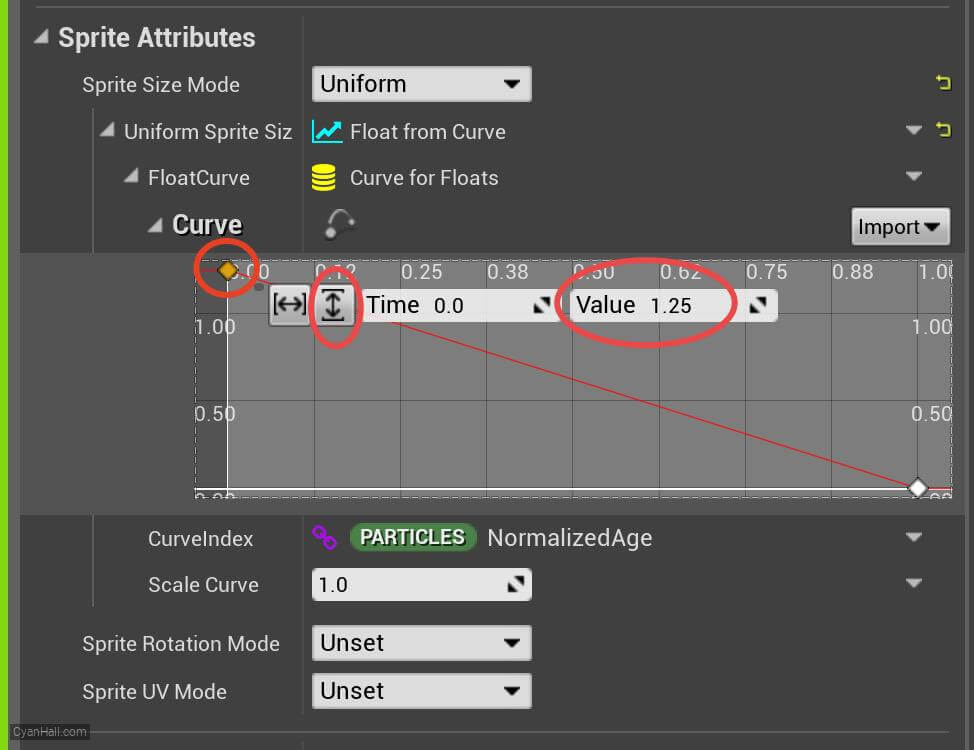
17.
Initialize Particles
Click on the first point and set its value to:
Tips: Sometimes, the newly set points will go beyond the boundaries of the existing chart. You can adjust the chart boundaries by clicking on the button circled in red.
1.25Tips: Sometimes, the newly set points will go beyond the boundaries of the existing chart. You can adjust the chart boundaries by clicking on the button circled in red.
18.
Initialize Particles
Mouse over the small red circle, right click, and select
Add key to Curve. 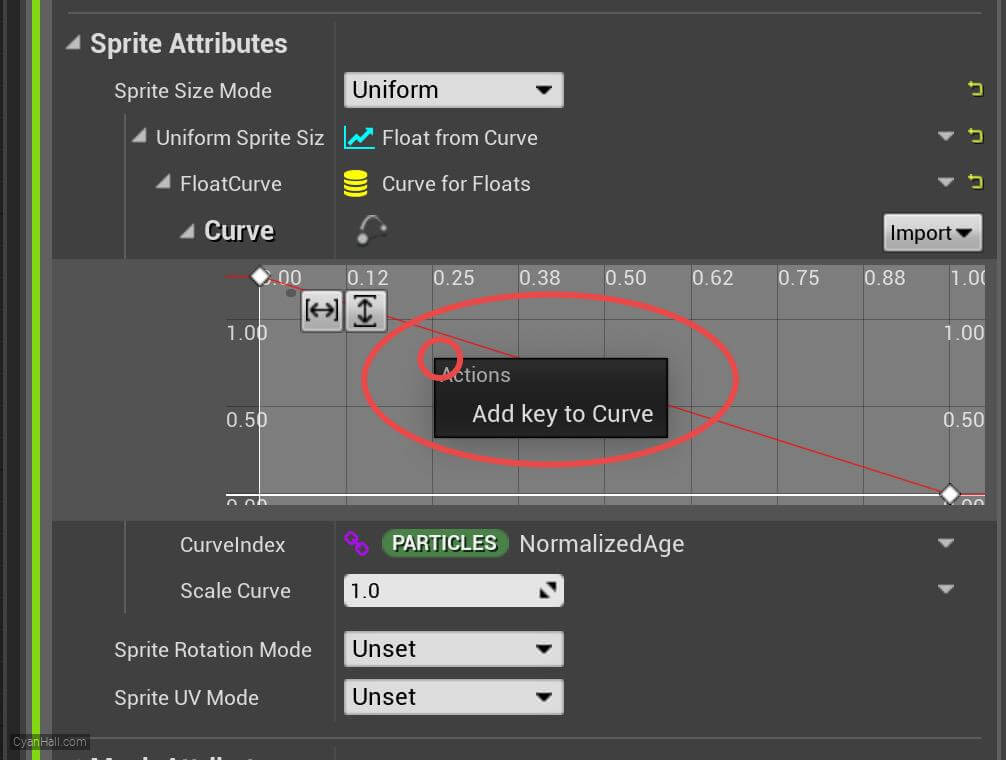
19.
Initialize Particles
Set the
Time of the newly added point to 0.24 and the Value to 2.27. 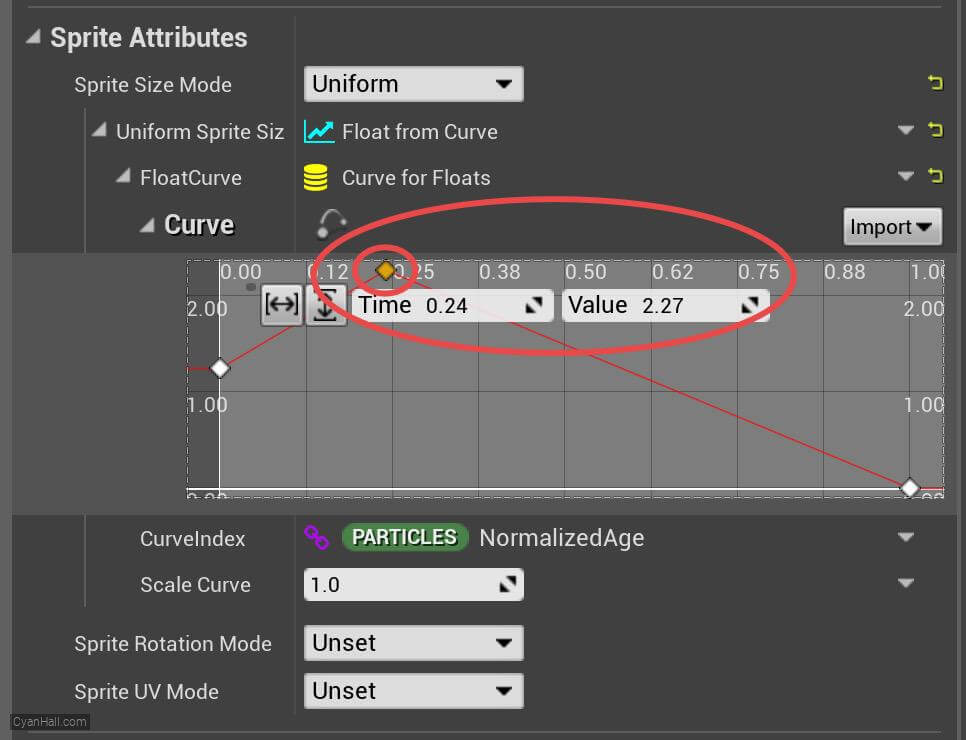
20.
Initialize Particles
In the same way, add three points: (time
0.51, value 2.87), (time 0.78, value 2.29, (time 1, value 1.36). 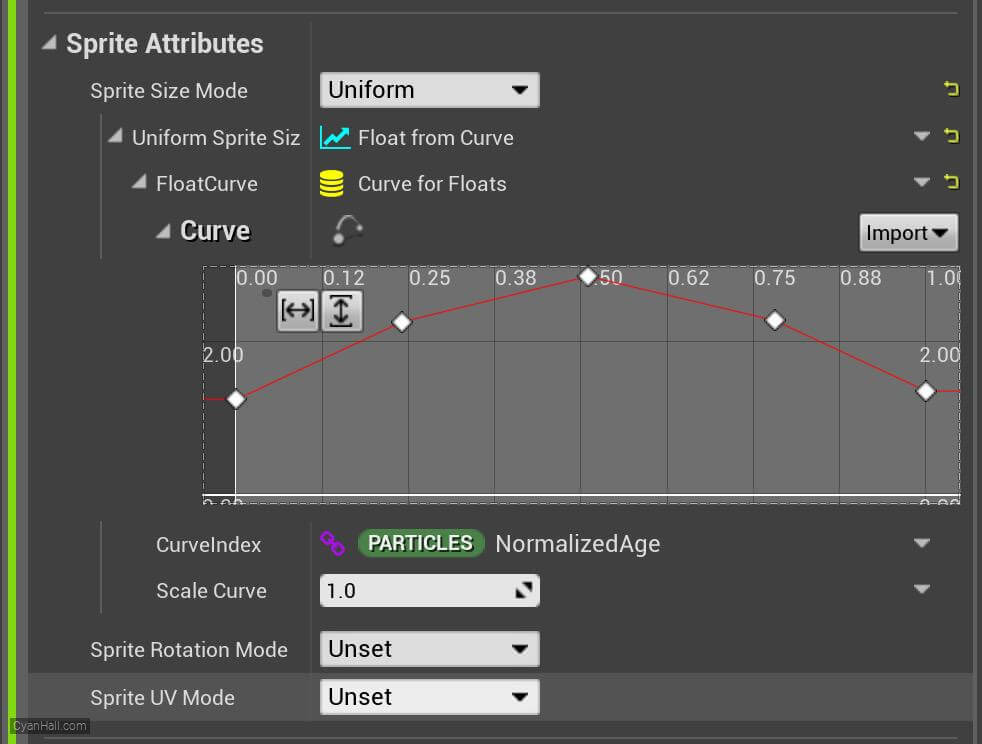
21.
Spawn Beam
Add
Spawn Beam module to the Particle Spawn section. 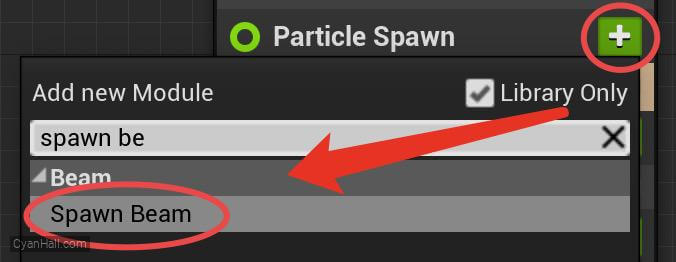
22.
Beam Width
Add
Beam Width module to the Particle Spawn section. 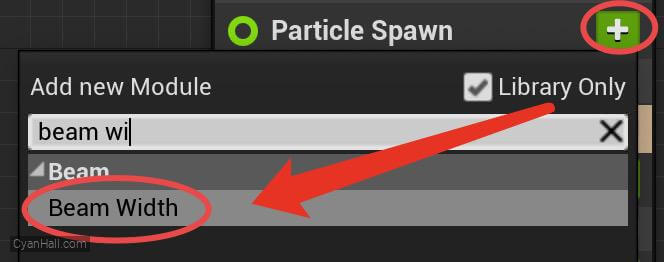
23.
Beam Width
Set the value type of
Beam Width to Float from Curve 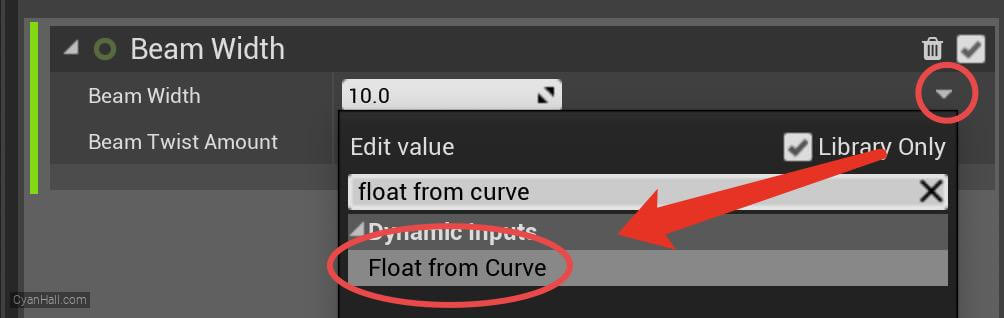
24.
Beam Width
Select the first point and edit its value to: (Time is
0.0, Value is 0.0). 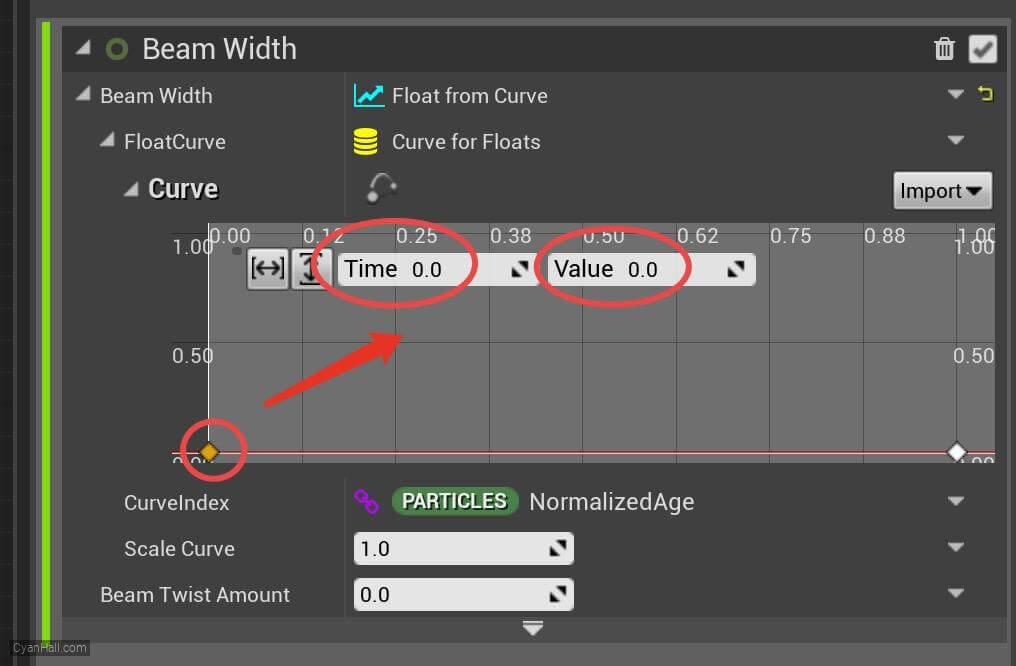
25.
Beam Width
Mouse over the small red circle, right click, and select
Add key to Curve. 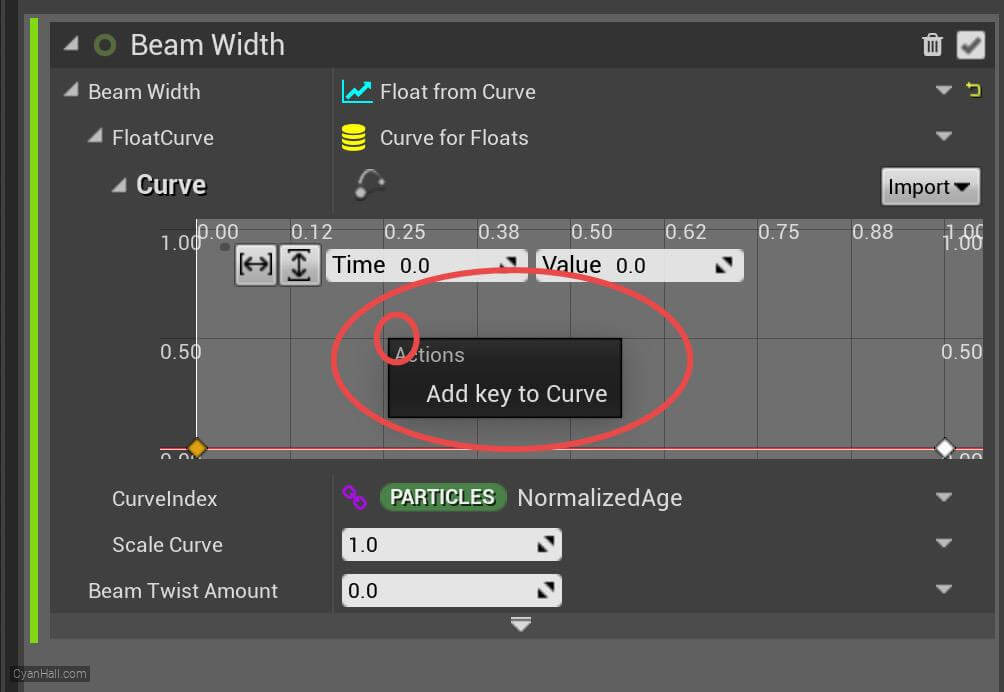
26.
Beam Width
Set the
Time of the newly added point to 0.25 and the Value to 2.3. 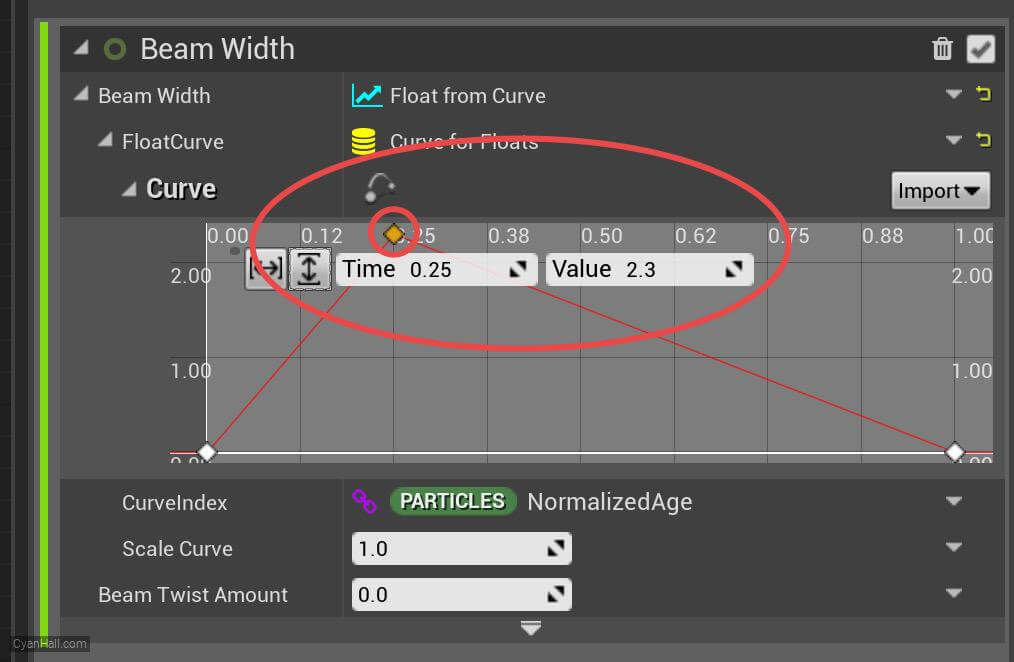
27.
Beam Width
In the same way, add a point:
Time is 0.5 and Value is 3.4. 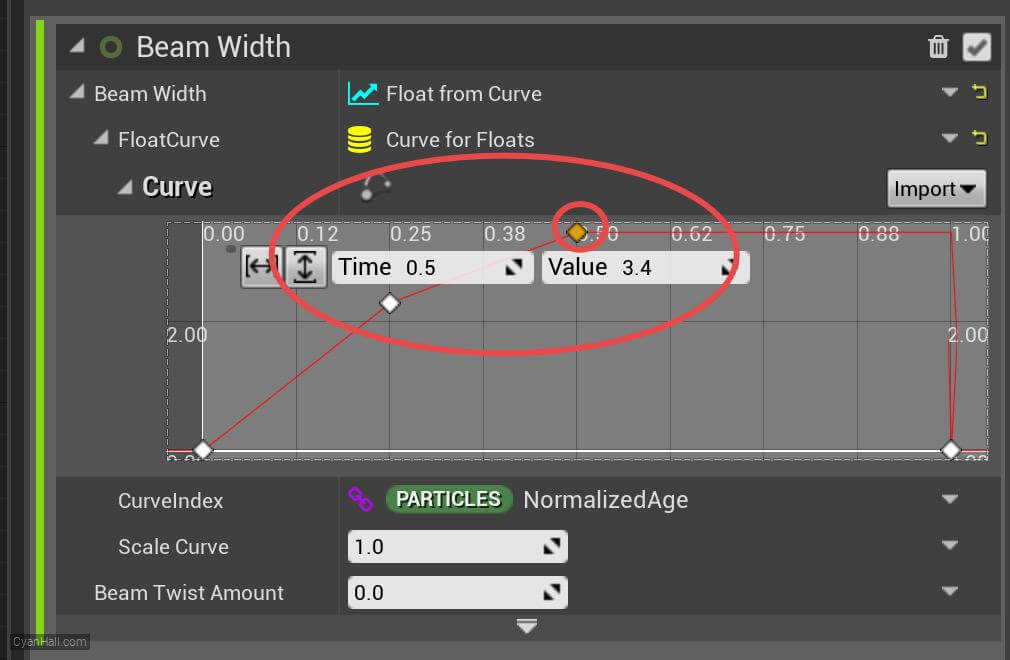
28.
Beam Width
Set the
Key Interpolation type for this point to Linear. 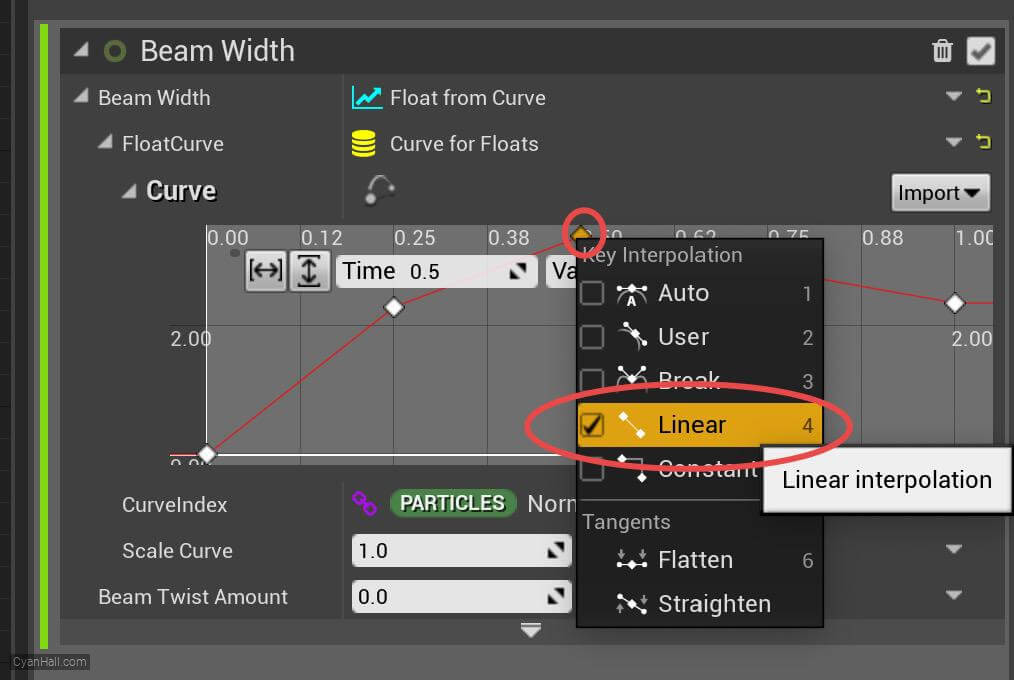
29.
Beam Width
Set the value of
CurveIndex to RibbonLinkOrder 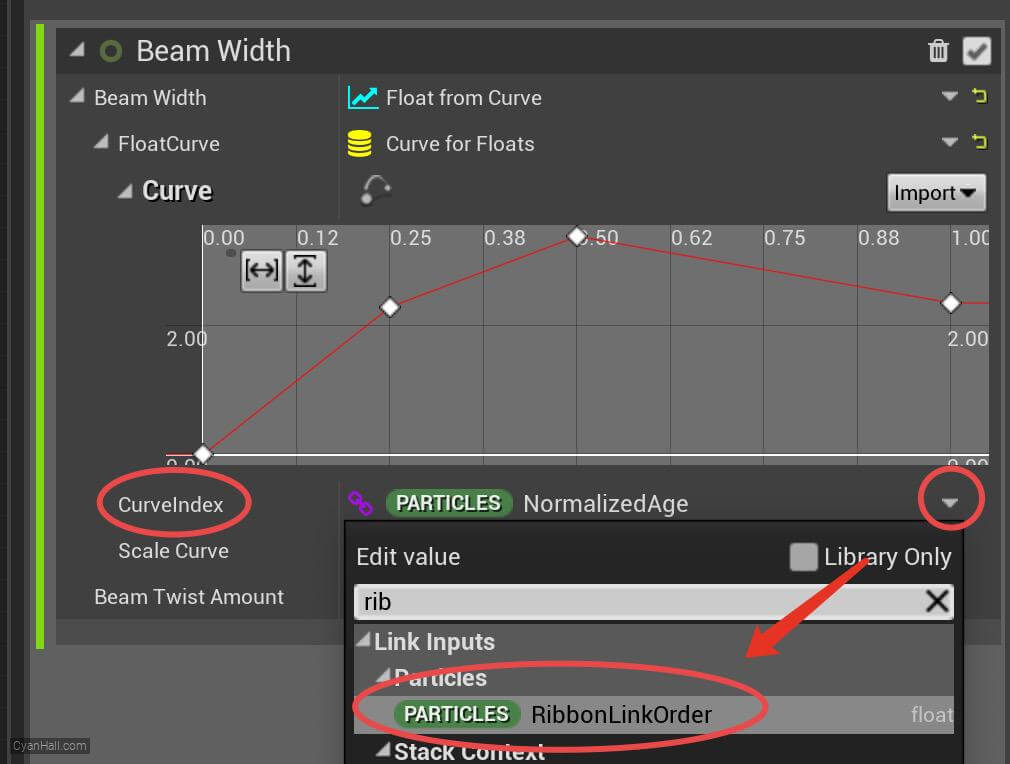
30.
Color
Add
Color module to the Particle Update section. 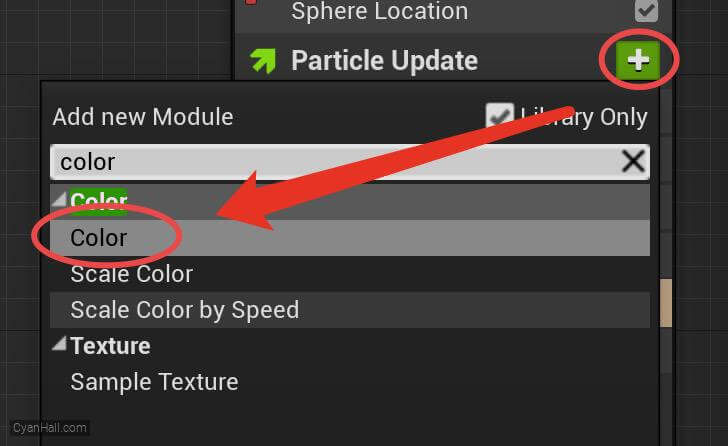
31.
Color
Set the value type of
Color to Lerp Linear Color 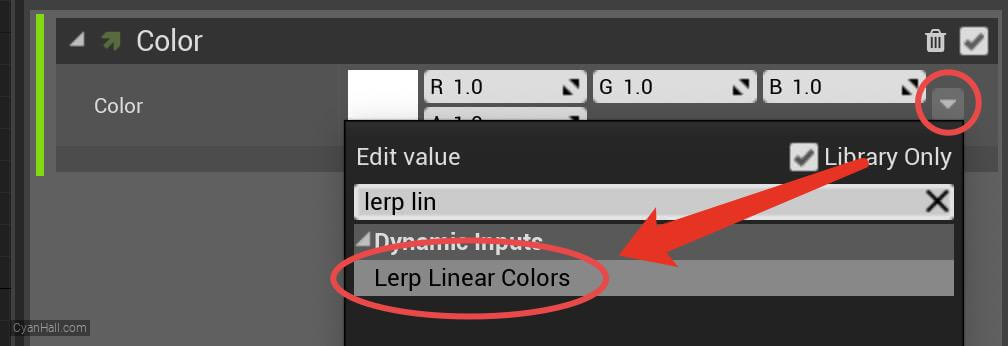
32.
Color
1. Set the StartColor to
2. Set the LerpFactor to
(1, 0.3, 0, 1) and the EndColor to (0, 0.2, 1, 1).2. Set the LerpFactor to
RibbonLinkOrder 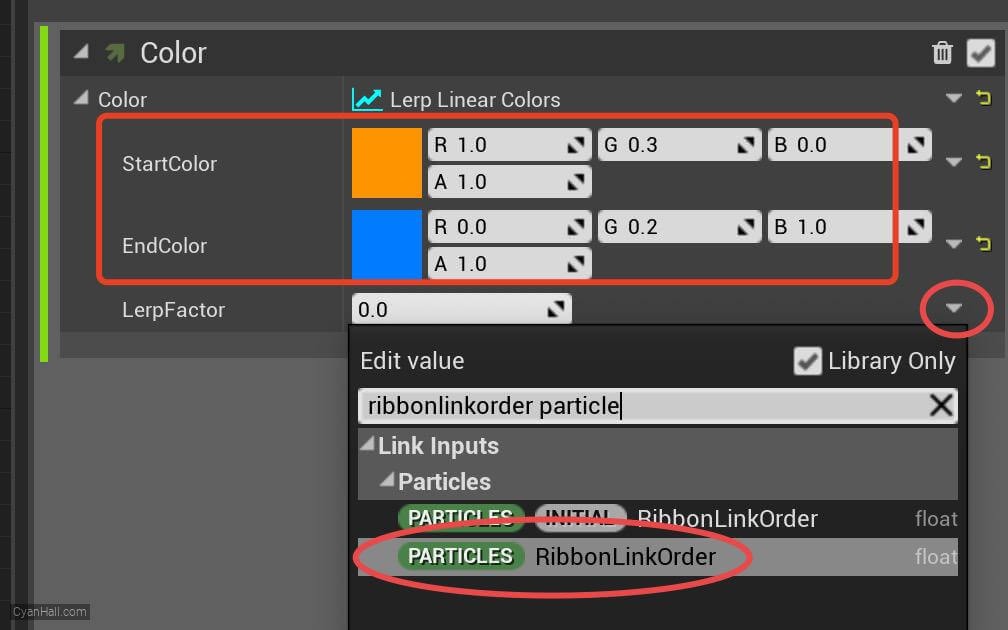
33.
Color
The
From there, normal particle simulation takes over, and because the ribbon ID and link order are not changing from frame to frame, the beams stay stable.
Particles.RibbonLinkOrder is the variable which determines how particles of a given RibbonID link up with each other.The
Spawn Beam module establishes the order based on the new particles as they are spawned in a burst, and assigns a new unique RibbonID to each new set of particles so they stay as separate beams instead of one large interconnected ribbon between all particles in the emitter.From there, normal particle simulation takes over, and because the ribbon ID and link order are not changing from frame to frame, the beams stay stable.
34.
Curl Noise Force
Add
Curl Noise Force module to the Particle Update section. 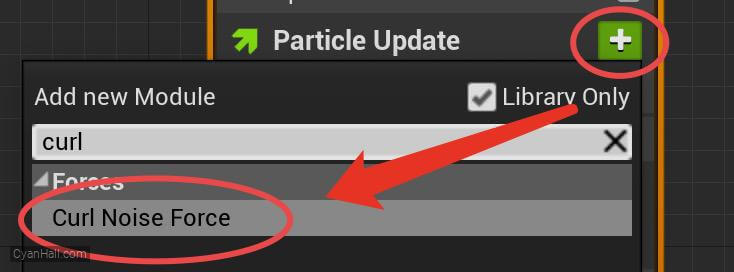
35.
Curl Noise Force
Click the first
Fix issue button to add its dependency on the SolveForcesAndVelocity module. 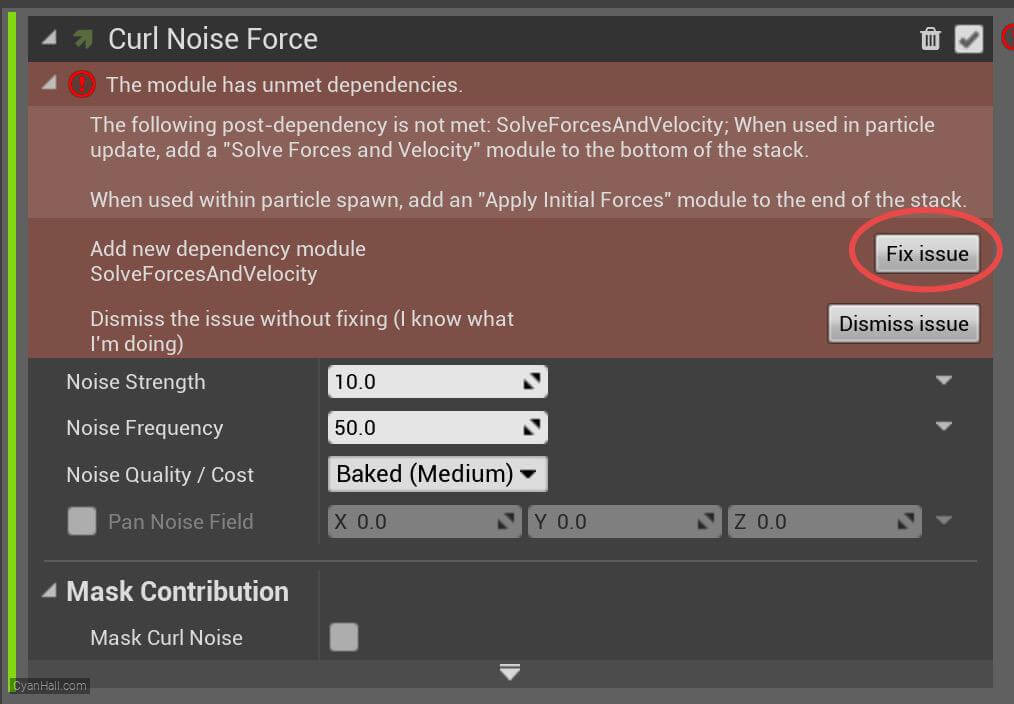
36.
Curl Noise Force
1. set
2. Set
3. Select the value of
4. set the value of
Noise Strength to 16.02. Set
Noise Frequency to 4.0.3. Select the value of
Noise Quality/Cost as Baked(High).4. set the value of
Pan Noise Field to (X: 0, Y: 0, Z: 1) 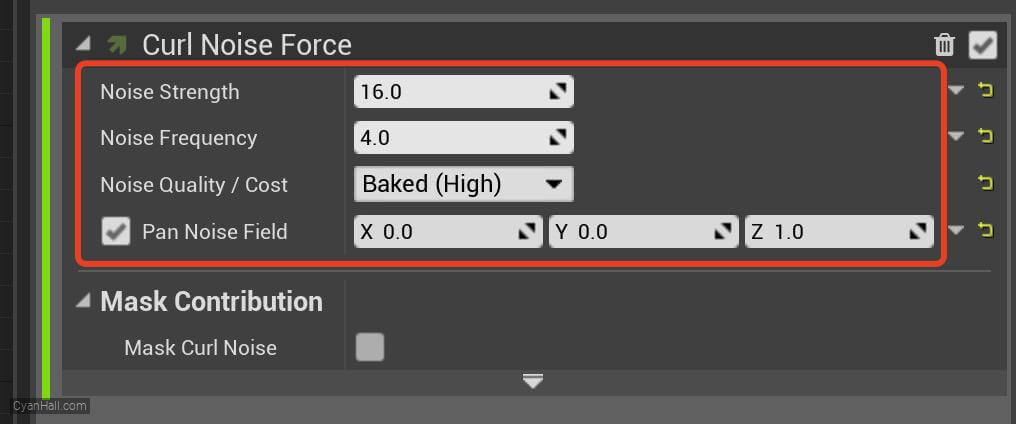
37.
Drag
Add
Drag module to the Particle Update section. 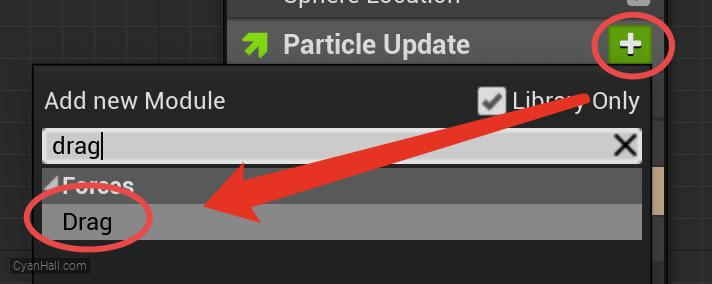
38.
Drag
Click the first
Fix issue button to fix the SolveForcesAndVelocity module's dependency order issue. 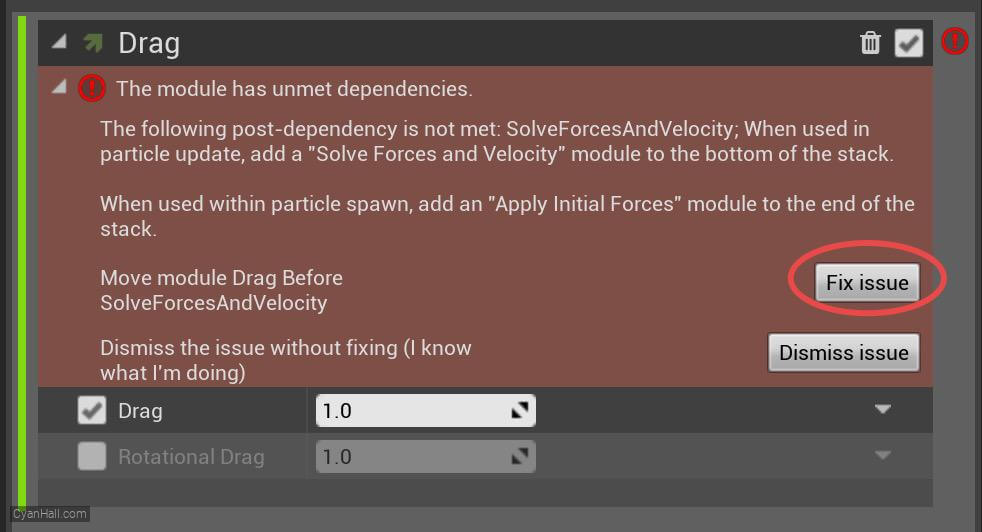
39.
Ribbon Renderer
Add
Ribbon Renderer module to the Render section. 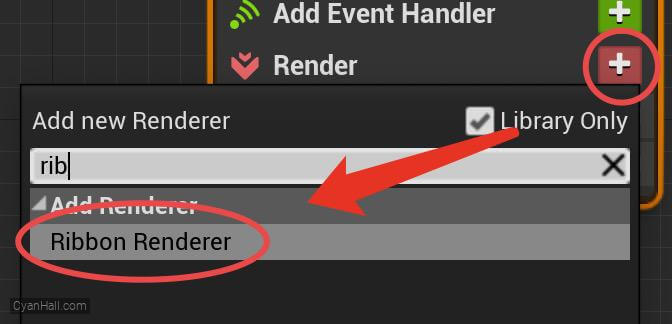
40.
Ribbon Renderer
Set the value of Material to
DefaultRibbonMaterial 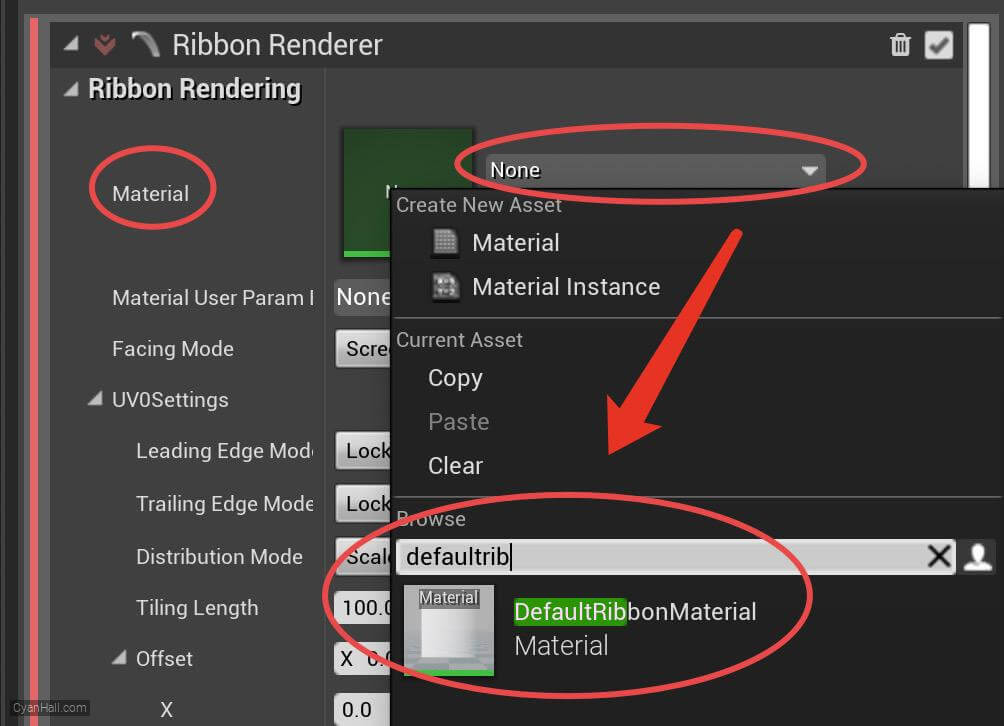
41.
🎉 Finish! 🎉
👉 Star me if it’s helpful.
Support Me: Patreon
Follow Me: Twitter, Reddit, Zhihu, Bilibili
Support Me: Patreon
Follow Me: Twitter, Reddit, Zhihu, Bilibili